Inspiring Living Lifestyle

Enjoy these wonderful recipes from our travels, our family’s and our favorite cookbooks.


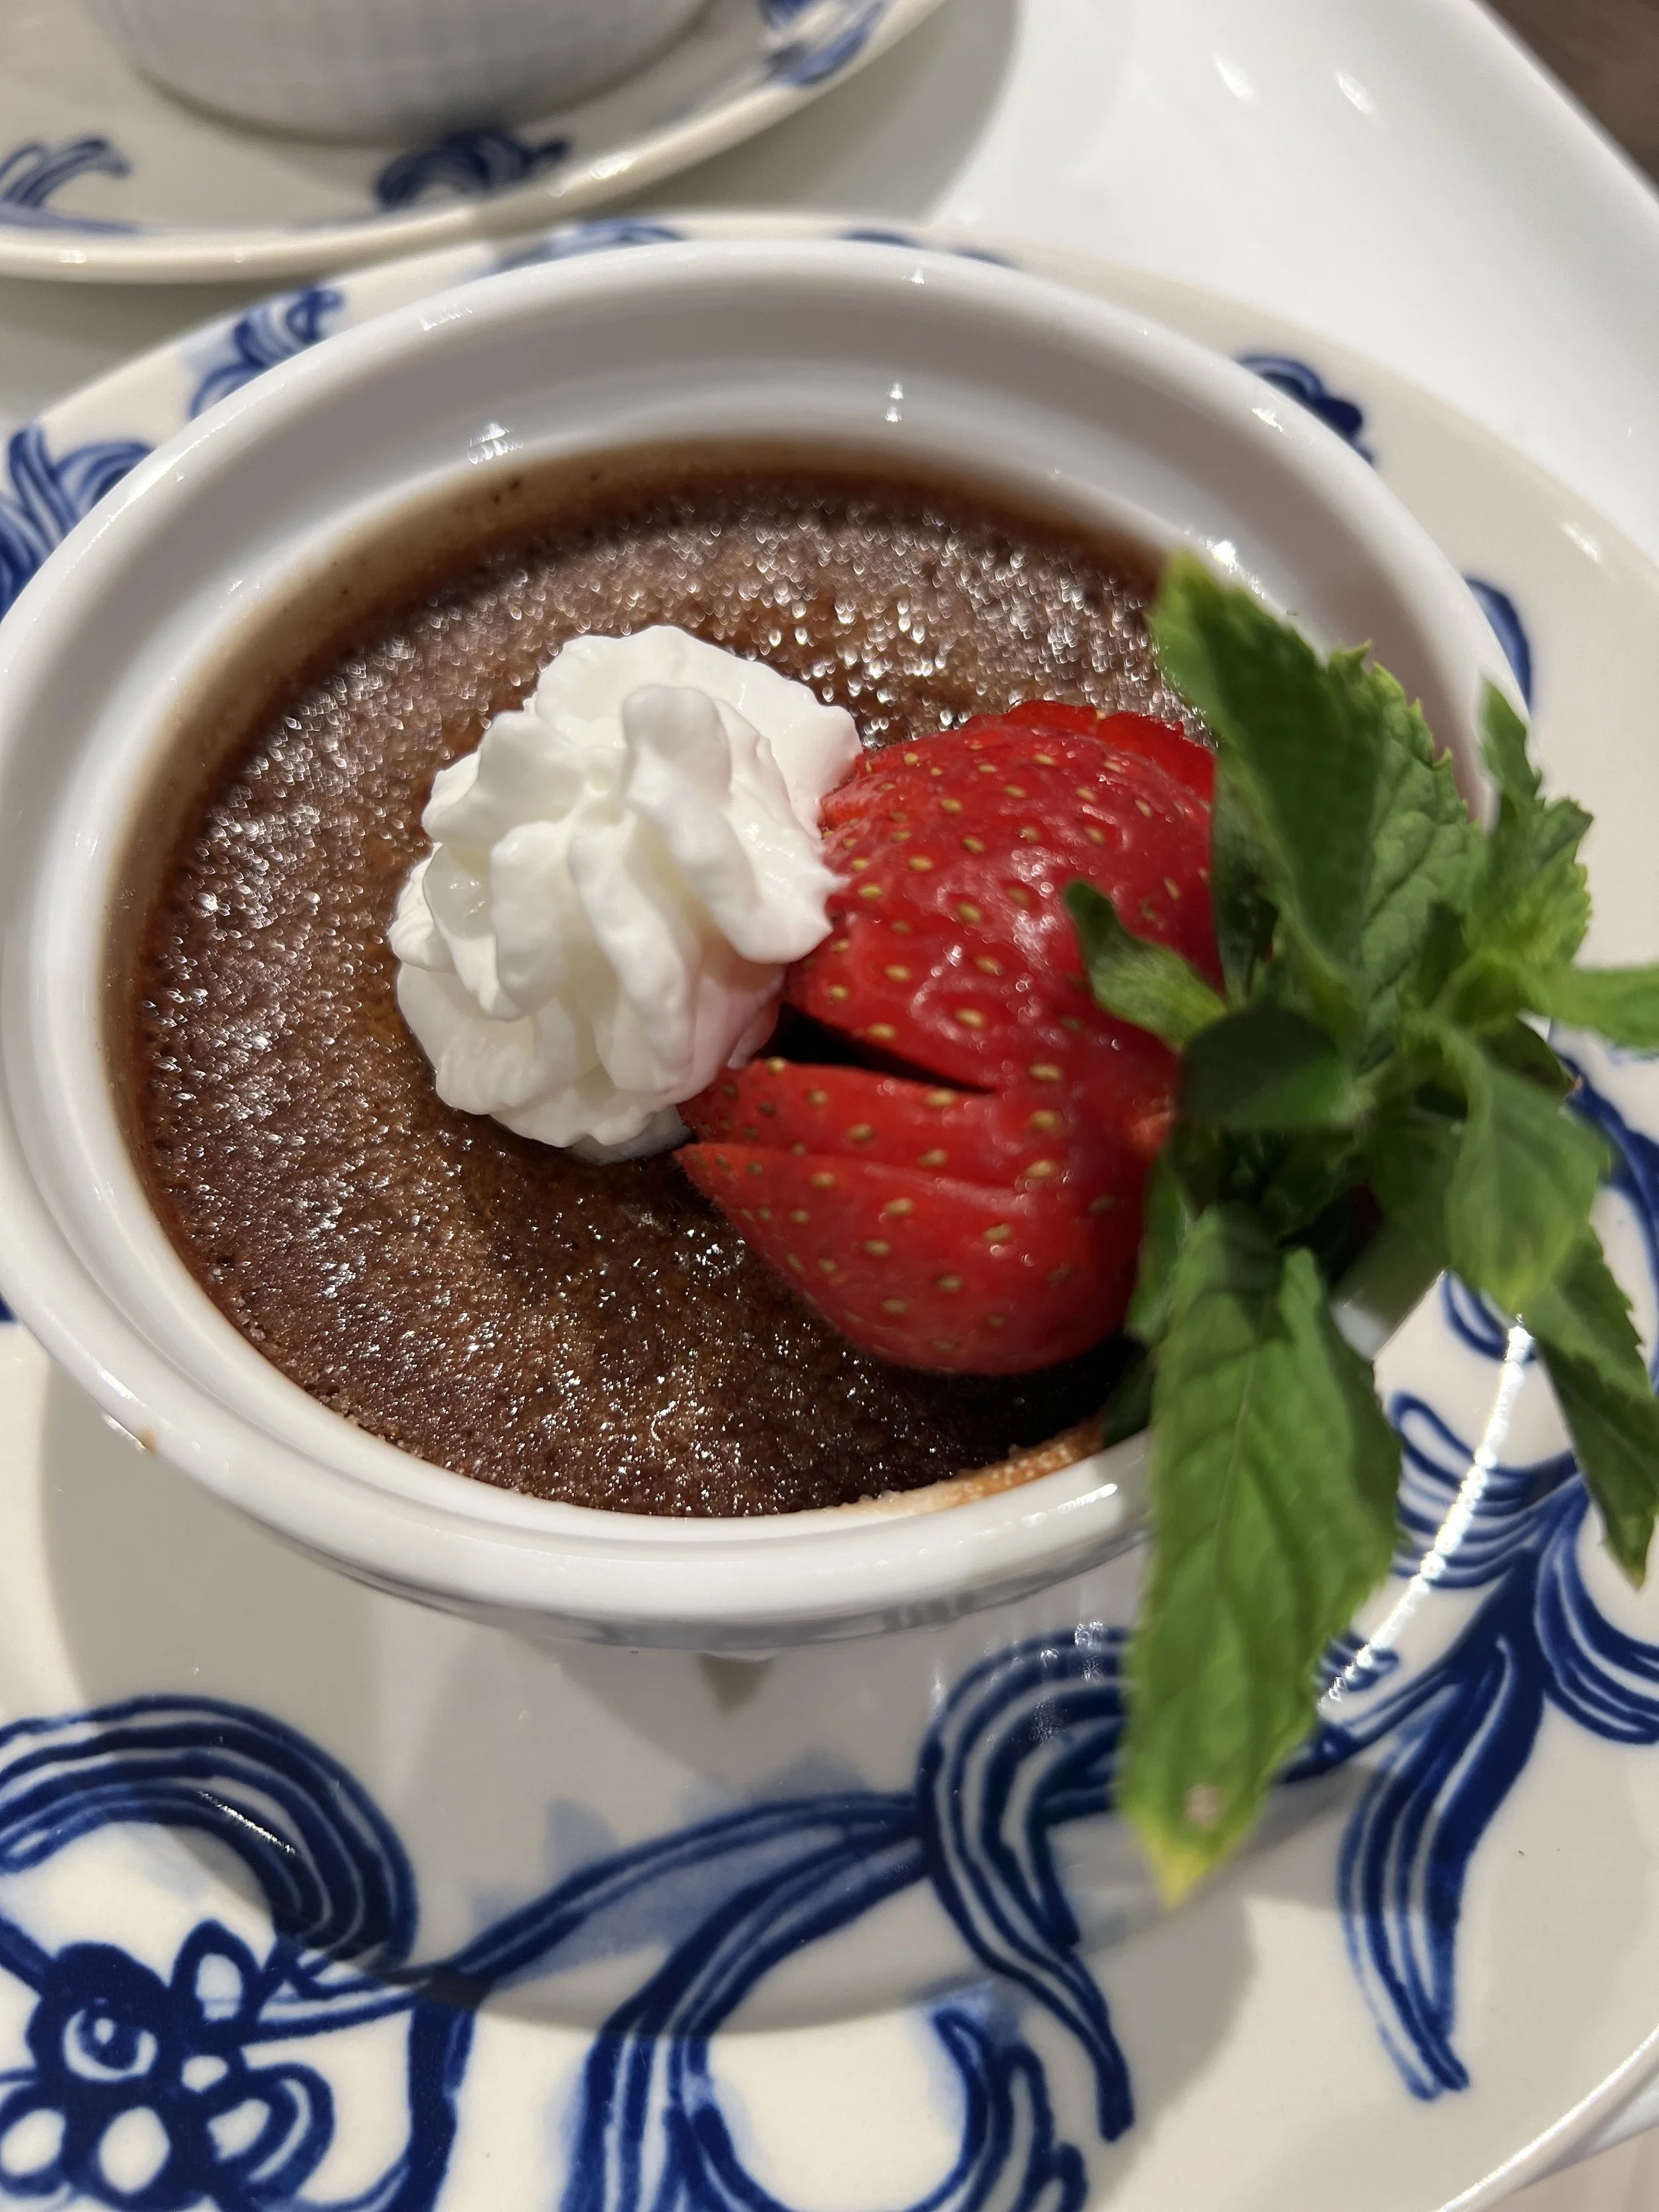
Chocolate Mocha Espresso Crème Brûlée

The standard Crème Brûlée has always been one of my favorites but why not take it to the next level. The name makes you think this is a hard dessert to make but it is quite easy. Just make sure you allow the custard to set properly when baking. You will blow your dinner guests away with this dessert.

4 Servings

INGREDIENTS

• 4 large egg yokes

• 1/3 cup of granulated sugar

• 2 cups of heavy cream

• ¾ cup of semi-sweet chocolate chips

• 2 tbsps. of strongly brewed coffee

• 2 tsp of espresso powder

• 1 teaspoon of vanilla extract

PREPARATION 

• Preheat your oven to 300 degrees and heat up a pot of water to near boiling.

• Add 2 cups of heavy cream into a small saucepan over medium heat being careful not to scald the cream. As soon as the cream begins to steam and bubbles form around the edges of the saucepan, turn off the heat and add the chocolate chips and whisk until they are fully melted.

• Now whisk in two tablespoons of strongly brewed coffee along with 1 teaspoon of espresso powder and 1 teaspoon of vanilla extract into the chocolate and cream mixture and then set to the side.  

• In a large mixing bowl, whisk the 4 egg yolks and 1/3 cup of granulated sugar vigorously until fully combined and silky.

• The very slowly drizzle in the chocolate, espresso, cream mixture into the egg yolk/sugar mixture making sure not to scramble the eggs.

• Set four 8-ounce ramekins into a large deep baking dish and pour in the chocolate/egg mixture into each ramekin in equal portions. Then add the hot water from the pot of water to the baking dish filling the dish so the water is roughly halfway up the side of each ramekin.

•Carefully transfer the baking dish into the 300-degree oven being sure not to splash any water into the filled ramekins.

• Bake the Crème Brûlée for 45 minutes or until the outer edges are lightly set and the center is still barely jiggly. You definitely do not want your custard soupy or runny so make very sure they are to this level of finish!  

• Carefully transfer the ramekins out of the water bath and let them come to room temperature.

• Cover the ramekins tightly with plastic wrap and chill in the refrigerator for at least 2 hours or until fully set.

• When ready to serve, and not before, sprinkle 2 teaspoons of granulated sugar over the top of each ramekin and then use a chef’s torch to caramelize the top of each crème brûlée.

• Garnish with sliced strawberries and a spring of mint and enjoy!

Beef Bourguignon

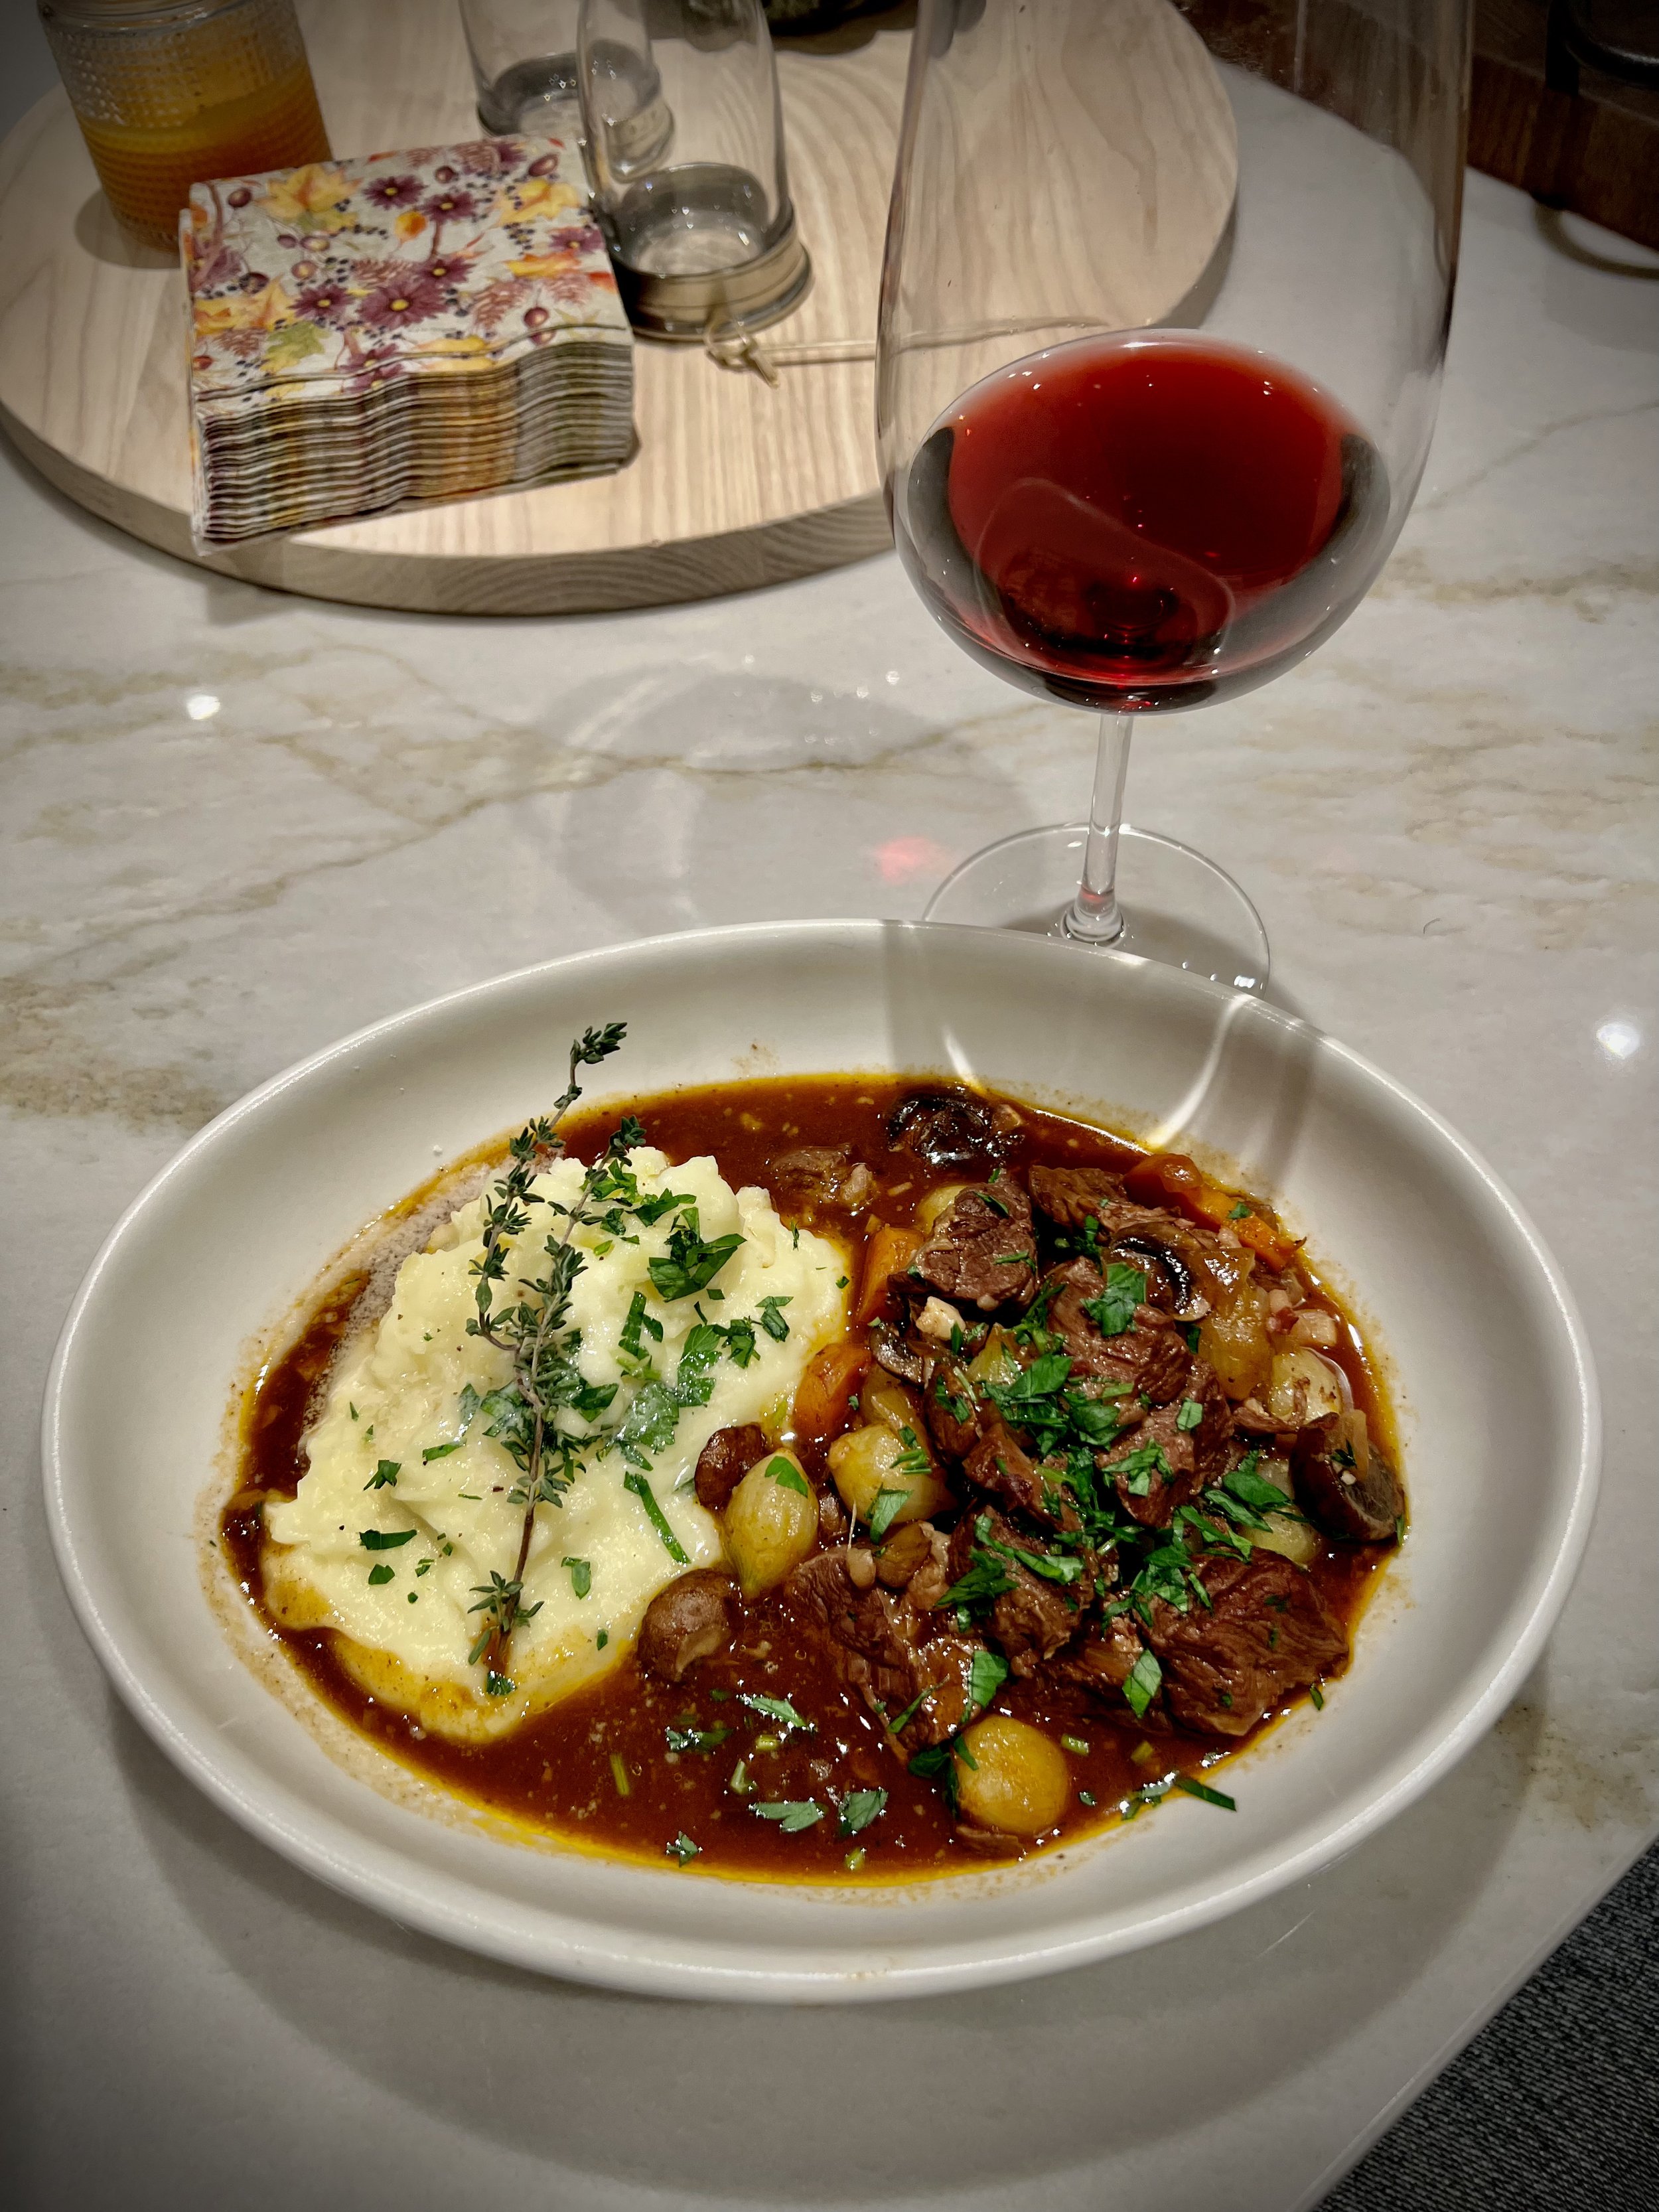
Just like Julia Child or Jacques Pepin you can easily make a darn good Beef Bourguignon. Everyone is always intimidated by this recipe and yes I am sure there are intricacies to this recipe that gourmet chefs know but that shouldn’t stop you for enjoying making and more importantly enjoying this fabulous dish.

This is a wonderful dish for two or for family and guests and it is easy and does not take long to make and trust me your kitchen will smell amazing and when your guests arrive they will be blown away by the fragrance and then of course by your amazing dinner.

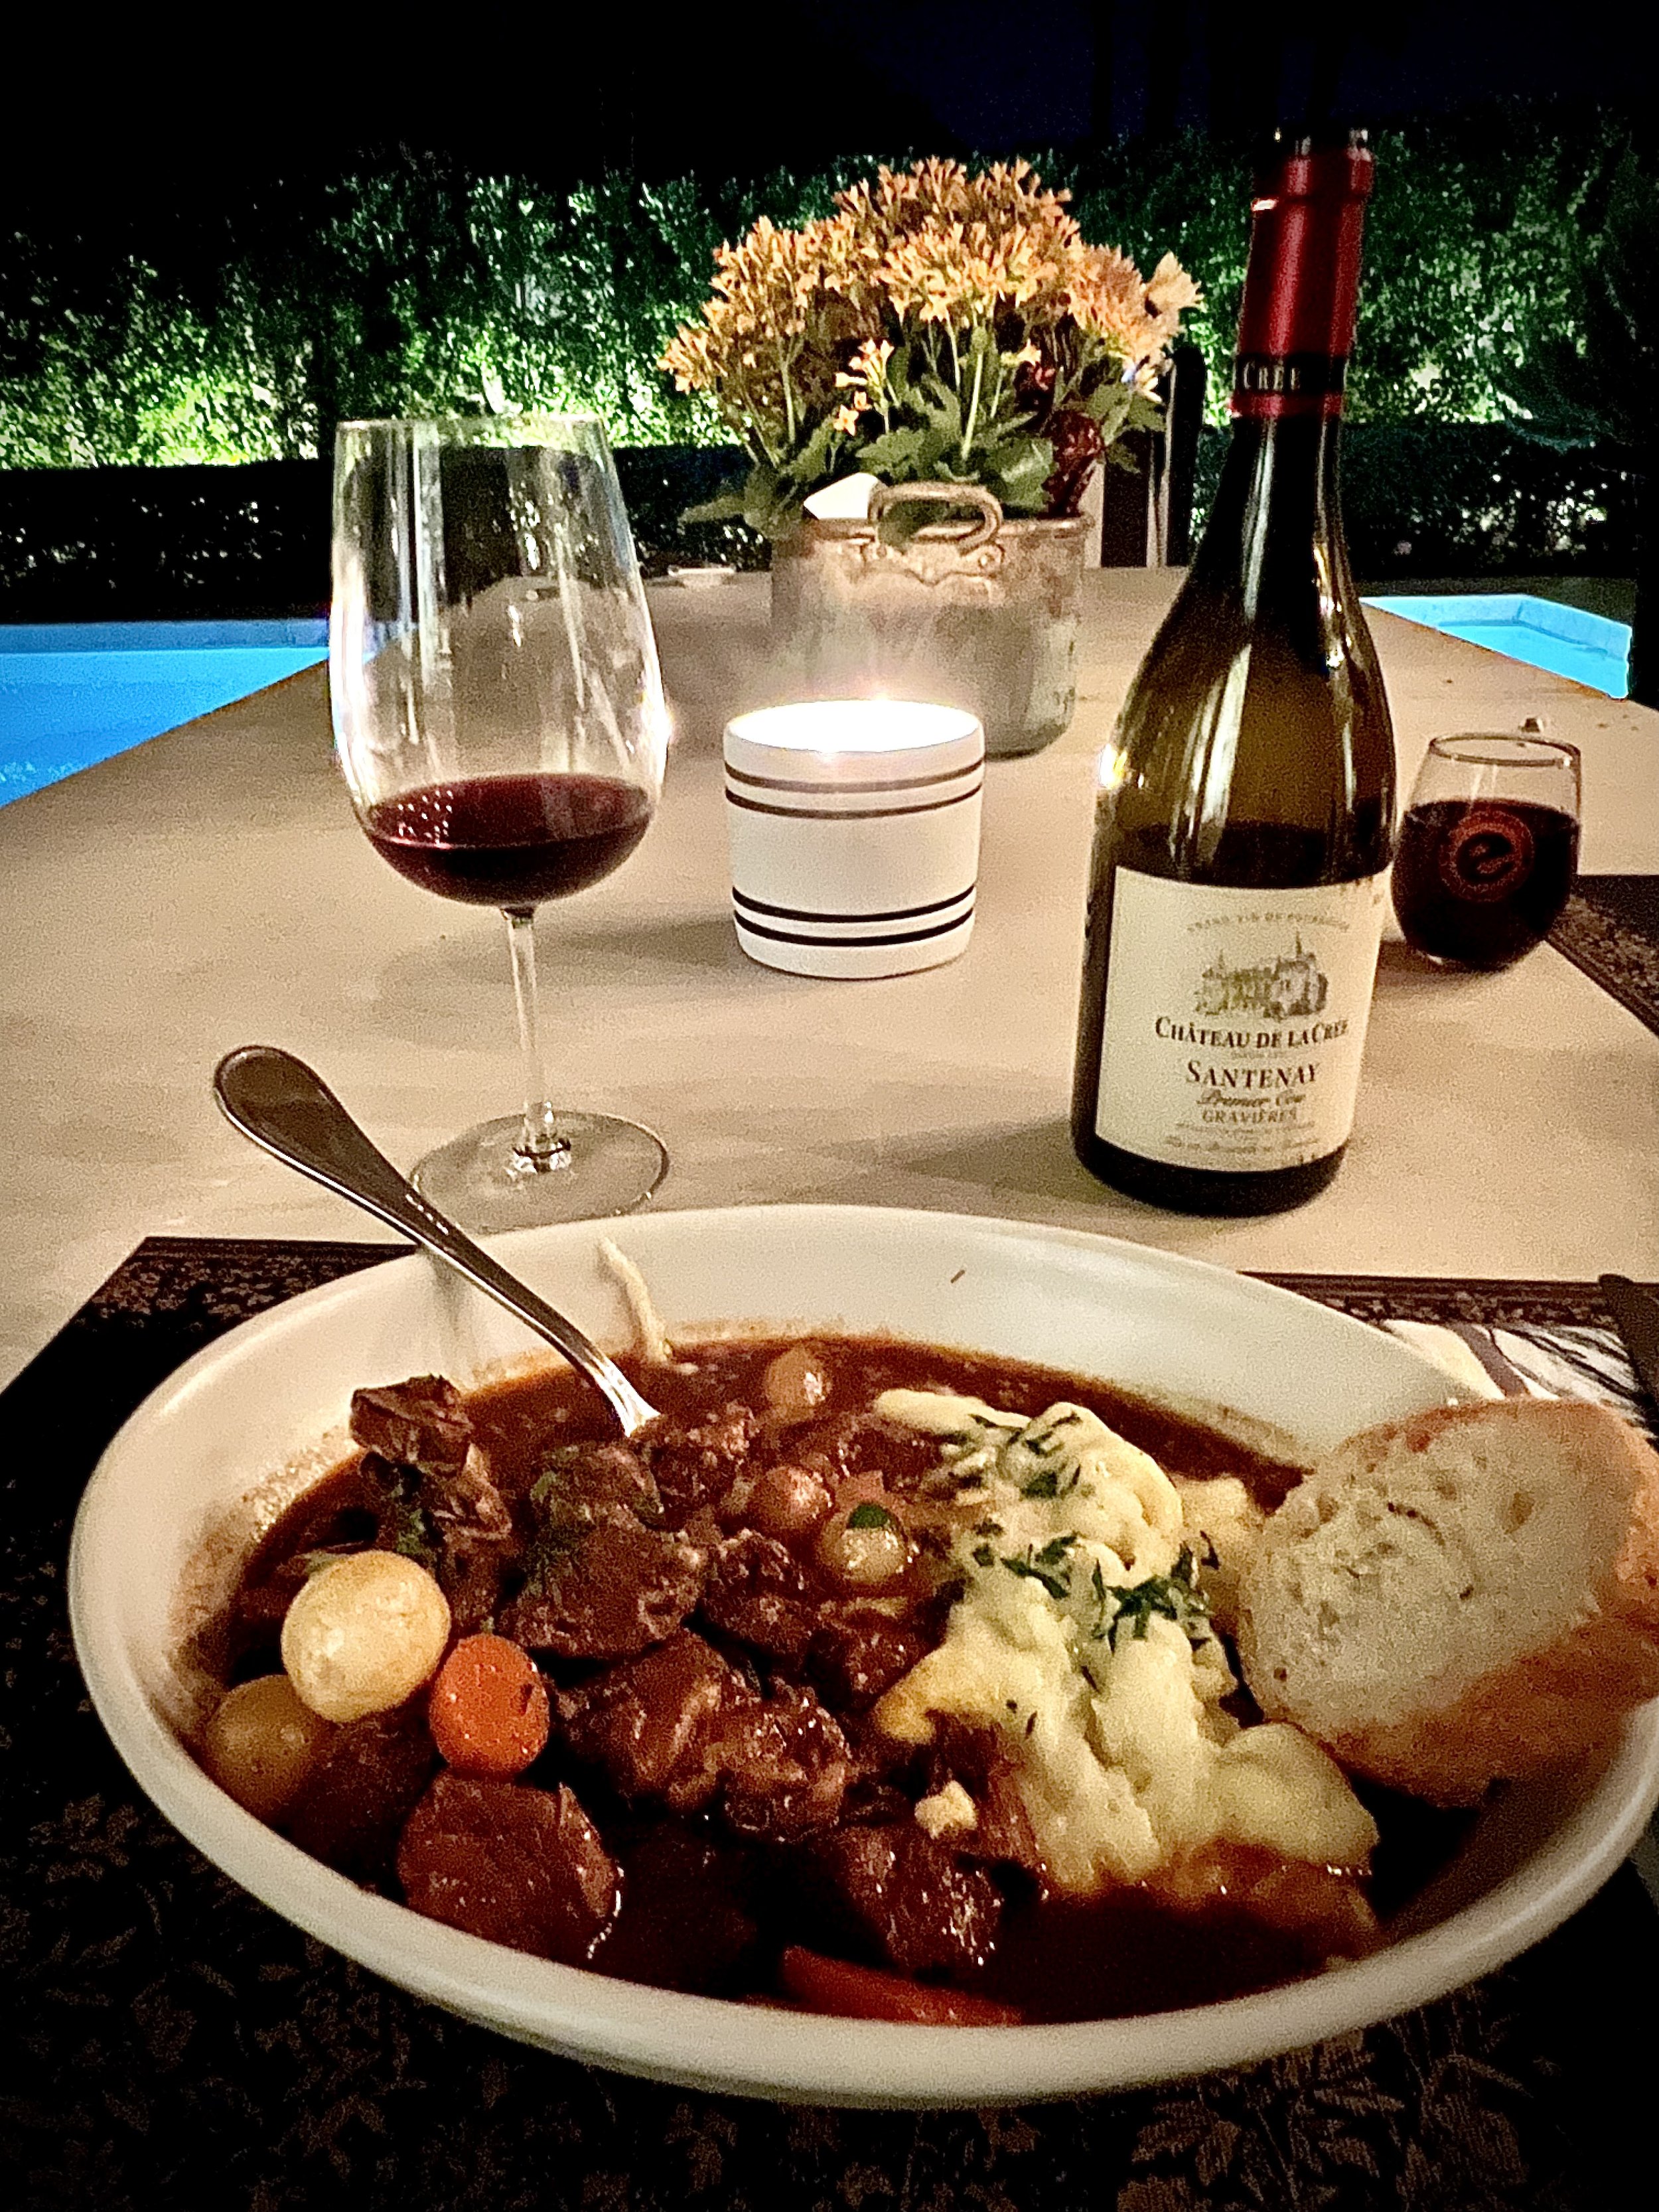
I prefer this dish in the fall and winter months given its hardy nature but I am sure no one will complain f you serve it on a hundred degree Arizona summer day either. I prepared this just for Isabel and I with beautiful French cafe music playing and we enjoyed the dish on our patio al Fresca style under a candlelit table with a wonderful French Bourdeax. ENJOY!


BEEF BOURGUIGNON

Ingredients:


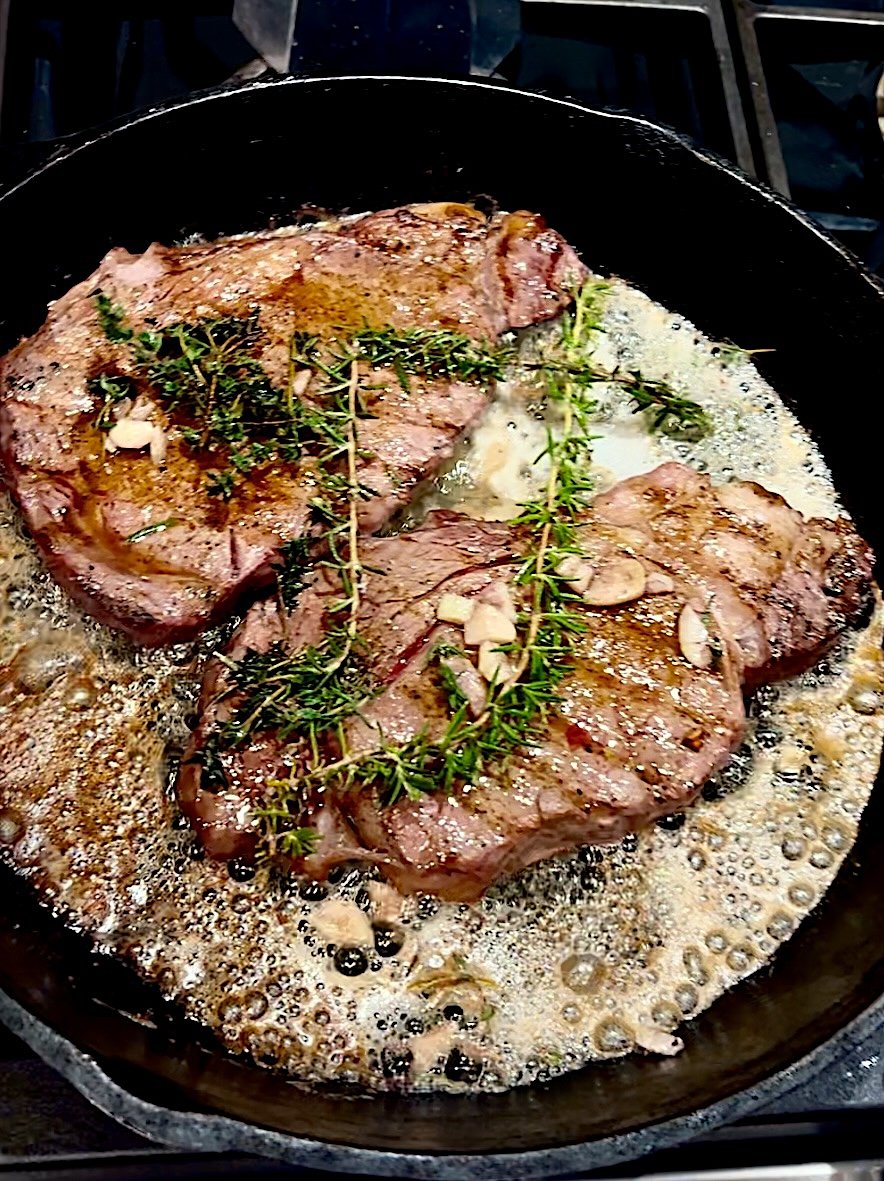
• 2-3 lbs of beef – cut of your choice – I used 3 ribeyes but a Beef Tenderloin is good too.

• 5 oz. of diced Pancetta

• 2 tbsp. of olive oil

• 1 small onion diced

• 2 large carrots sliced

• 3 cups of French red wine

• 2 cups of beef broth

• 2 tbsp. of tomato paste

• 1 bouquet garni of fresh herbs

• 2 bay leaves

• salt and pepper

• 1 – 2 cups of frozen pearl onions

• 8 oz package of sliced Baby Bella mushrooms

• Fresh Italian leaf parsley garnish

• thicken with a one tablespoon corn starch and one tablespoon of water slurry

• sprinkle of tartufo salt and pepper.


Directions:


Add a couple tablespoons of olive oil to your Dutch Oven with a lid. Over medium heat, sauté the pancetta until the fat is rendered and the pancetta is lightly browned. Remove and set aside on a paper towel lined bowl.


While the pancetta is cooking, cube your beef and generously season with salt and pepper. Add to the Dutch Oven making sure to space it out so it sears and does not steam.


Once browned nicely, remove the cubed beef and set aside.


Now you can add some more olive oil if needed to sauté your onions, carrots, and garlic over medium heat. Cook these until the onions are translucent, and then add the red wine and deglaze your pan scraping up all of the brown bits on the bottom. Add the beef broth and tomato paste. Stir and add the Bouquet Garni. I tied a bundle of Italian parsley, thyme, and rosemary. Toss in a couple loose bay leaves. Put the lid on the Dutch Oven and set into a 275º oven for two hours.


Remove from the oven and set your Dutch Oven on the stove on low to medium heat. Remove the Bouquet Garni and discard. Now you can add the corn startch/water slurry to thicken the stew or a combo of butter and flour if you don’t care about being gluten and dairy free. Let the stew thicken then add the frozen pearl onions and sliced baby bella mushrooms.


Garnish with a sprinkle of tartufo salt, pepper and finely chopped Italian leaf parsley.


Serve and enjoy!

Carrot-Top Pesto

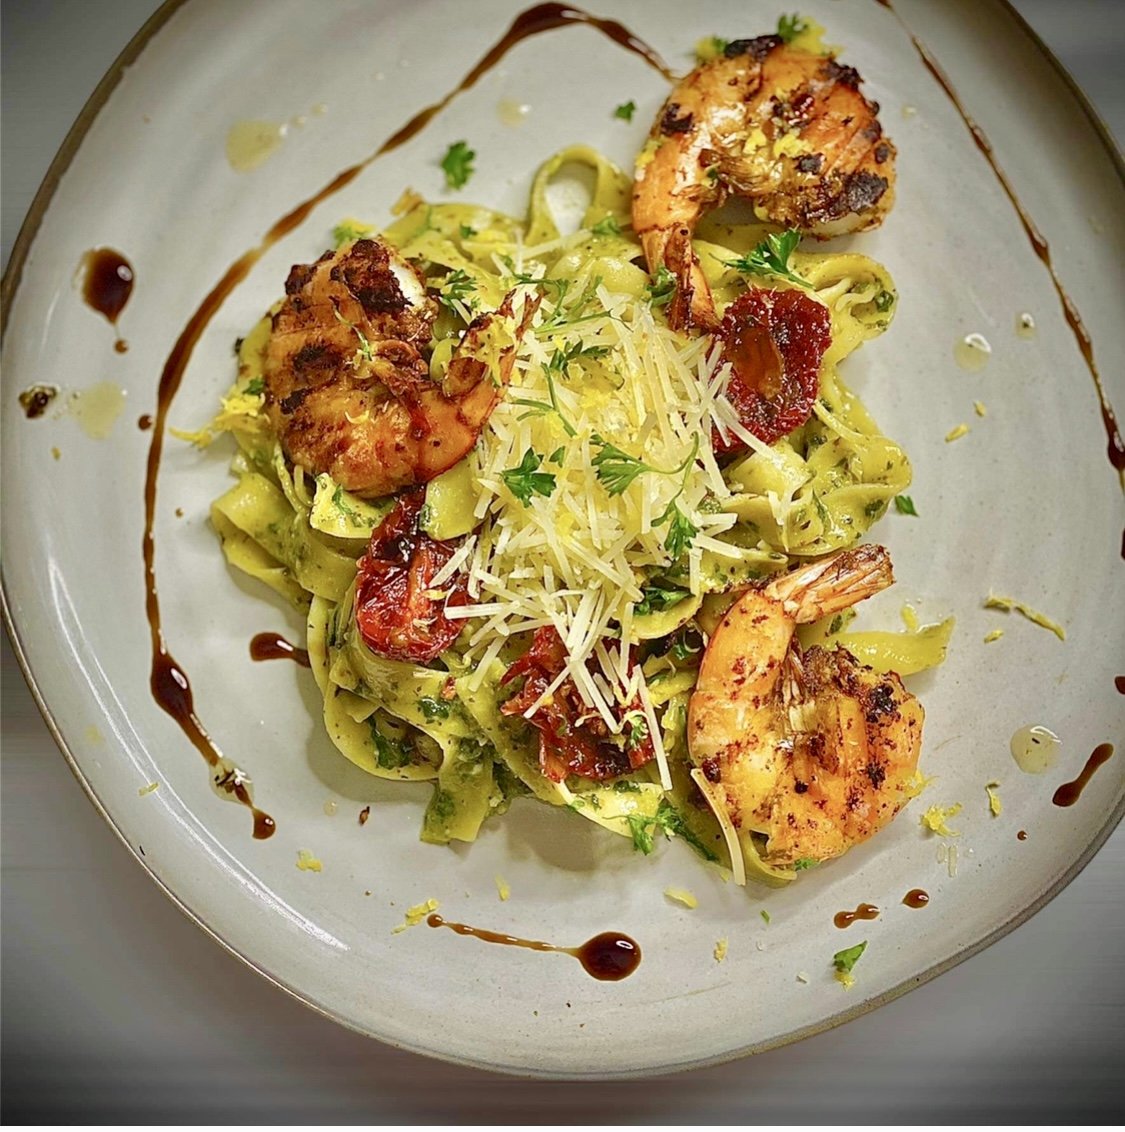
Chef Bombay joined us in the Candelaria Design Showroom Kitchen for one of our virtual cooking classes this April and showed us how to make a grilled shrimp and chicken pasta with roasted tomatoes and his delicious and nutritious carrot-top pesto!

Bombay Creations provides luxury, in-home dining experiences across the country and is based here in Phoenix, AZ. "At Bombay Creations we thrive on building long lasting relationships throughout our communities by giving back to those in need! We strive to prepare every meal with local sustainable foods while using many practices that promotes a positive social impact that is based around our passion and craftsmanship towards the industry."

Pesto Instructions:

  • In a dry pan (no oil) over low-medium heat, roast the pine nuts. Remove and cool.

  • Cut off the carrot tops and wash the leaves. Pat dry and add in the carrot tops and all the remaining ingredients to the blender except for the oil.

  • Blend in a food processor until completely broken down.

  • Add in olive oil gradually while blending until you get a slightly emulsified sauce. Add more oil or water if needed.

Coquilles Saint Jacques – A French Classic

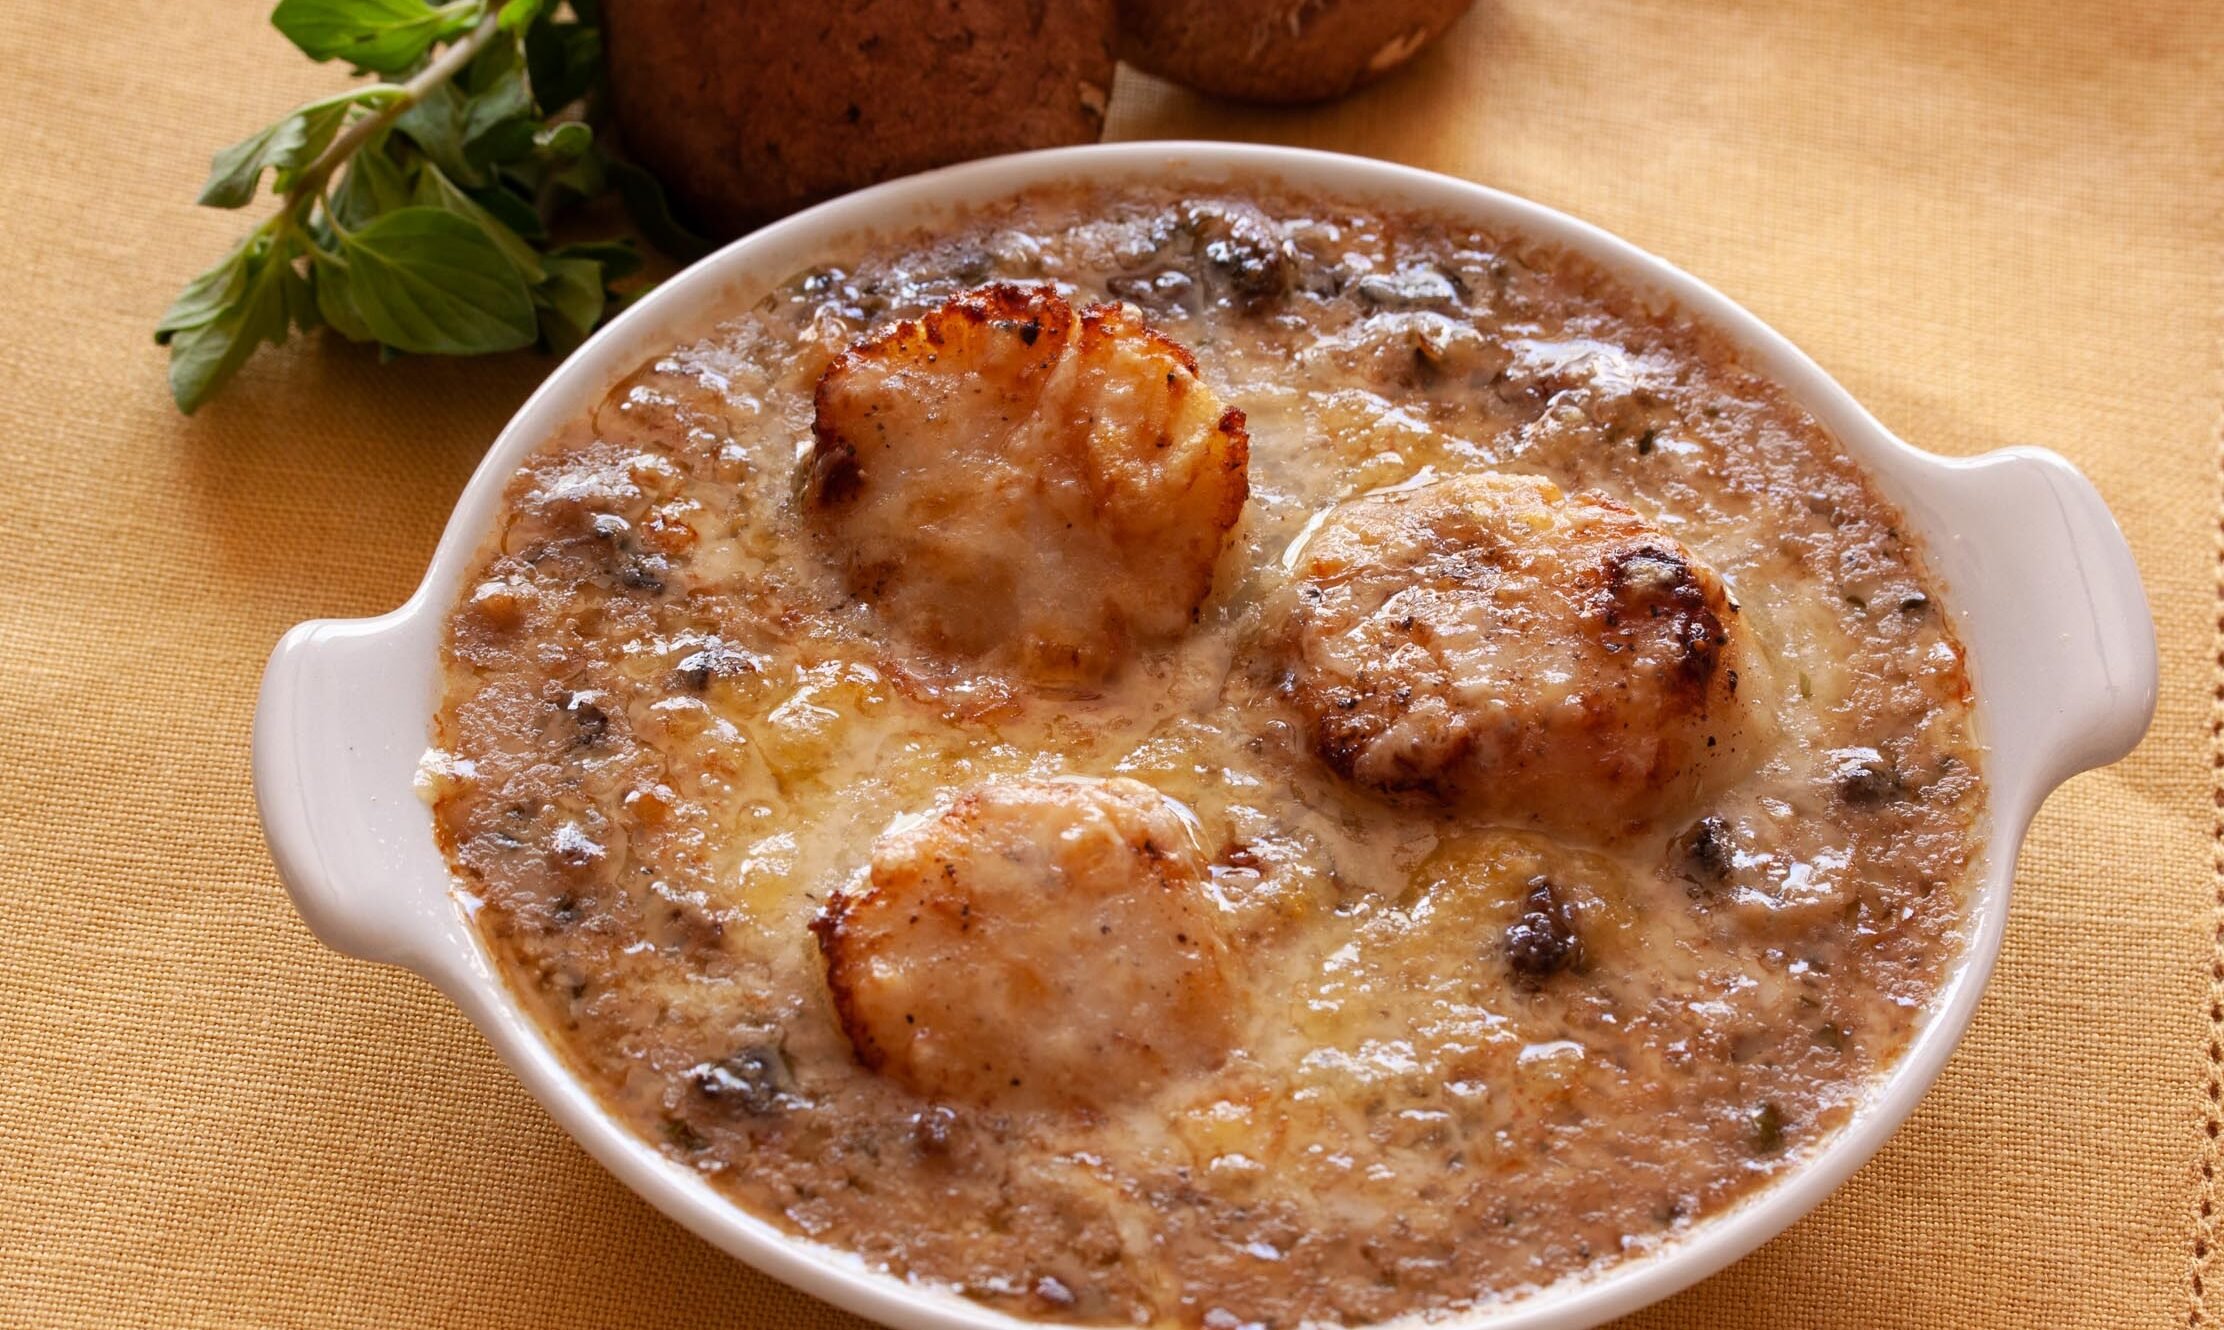
In our first cooking class of 2022, Mark & Tiffany Candelaria are joined in the kitchen by Chef Giangi Townsend of Giangi’s Kitchen, a top-rated food and recipe blog and participant on The Food Network’s Guy’s Grocery Games. We are so lucky to have Giangi both as a podcast guest last November and now as a guest chef on our Candelaria cooking class!! Click the video below to watch our cooking class with Giangi on YouTube and further down you’ll find the recipe link for the classic French dish, Coquilles Saint Jacques Giangi teaches us to make. Enjoy!

“Coquilles Saint Jacques is the French word for scallops. It always held a bit of mystery to me and it took a try to make it and quite the opposite happened: Super easy to make. Nothing more delightful than tender scallops, or bay scallops, nestled in a bed of mushrooms, cream, and wine topped with bubbly cheese under the broiler. The individual gratin dish makes for a dramatic table presentation.” - Giangi

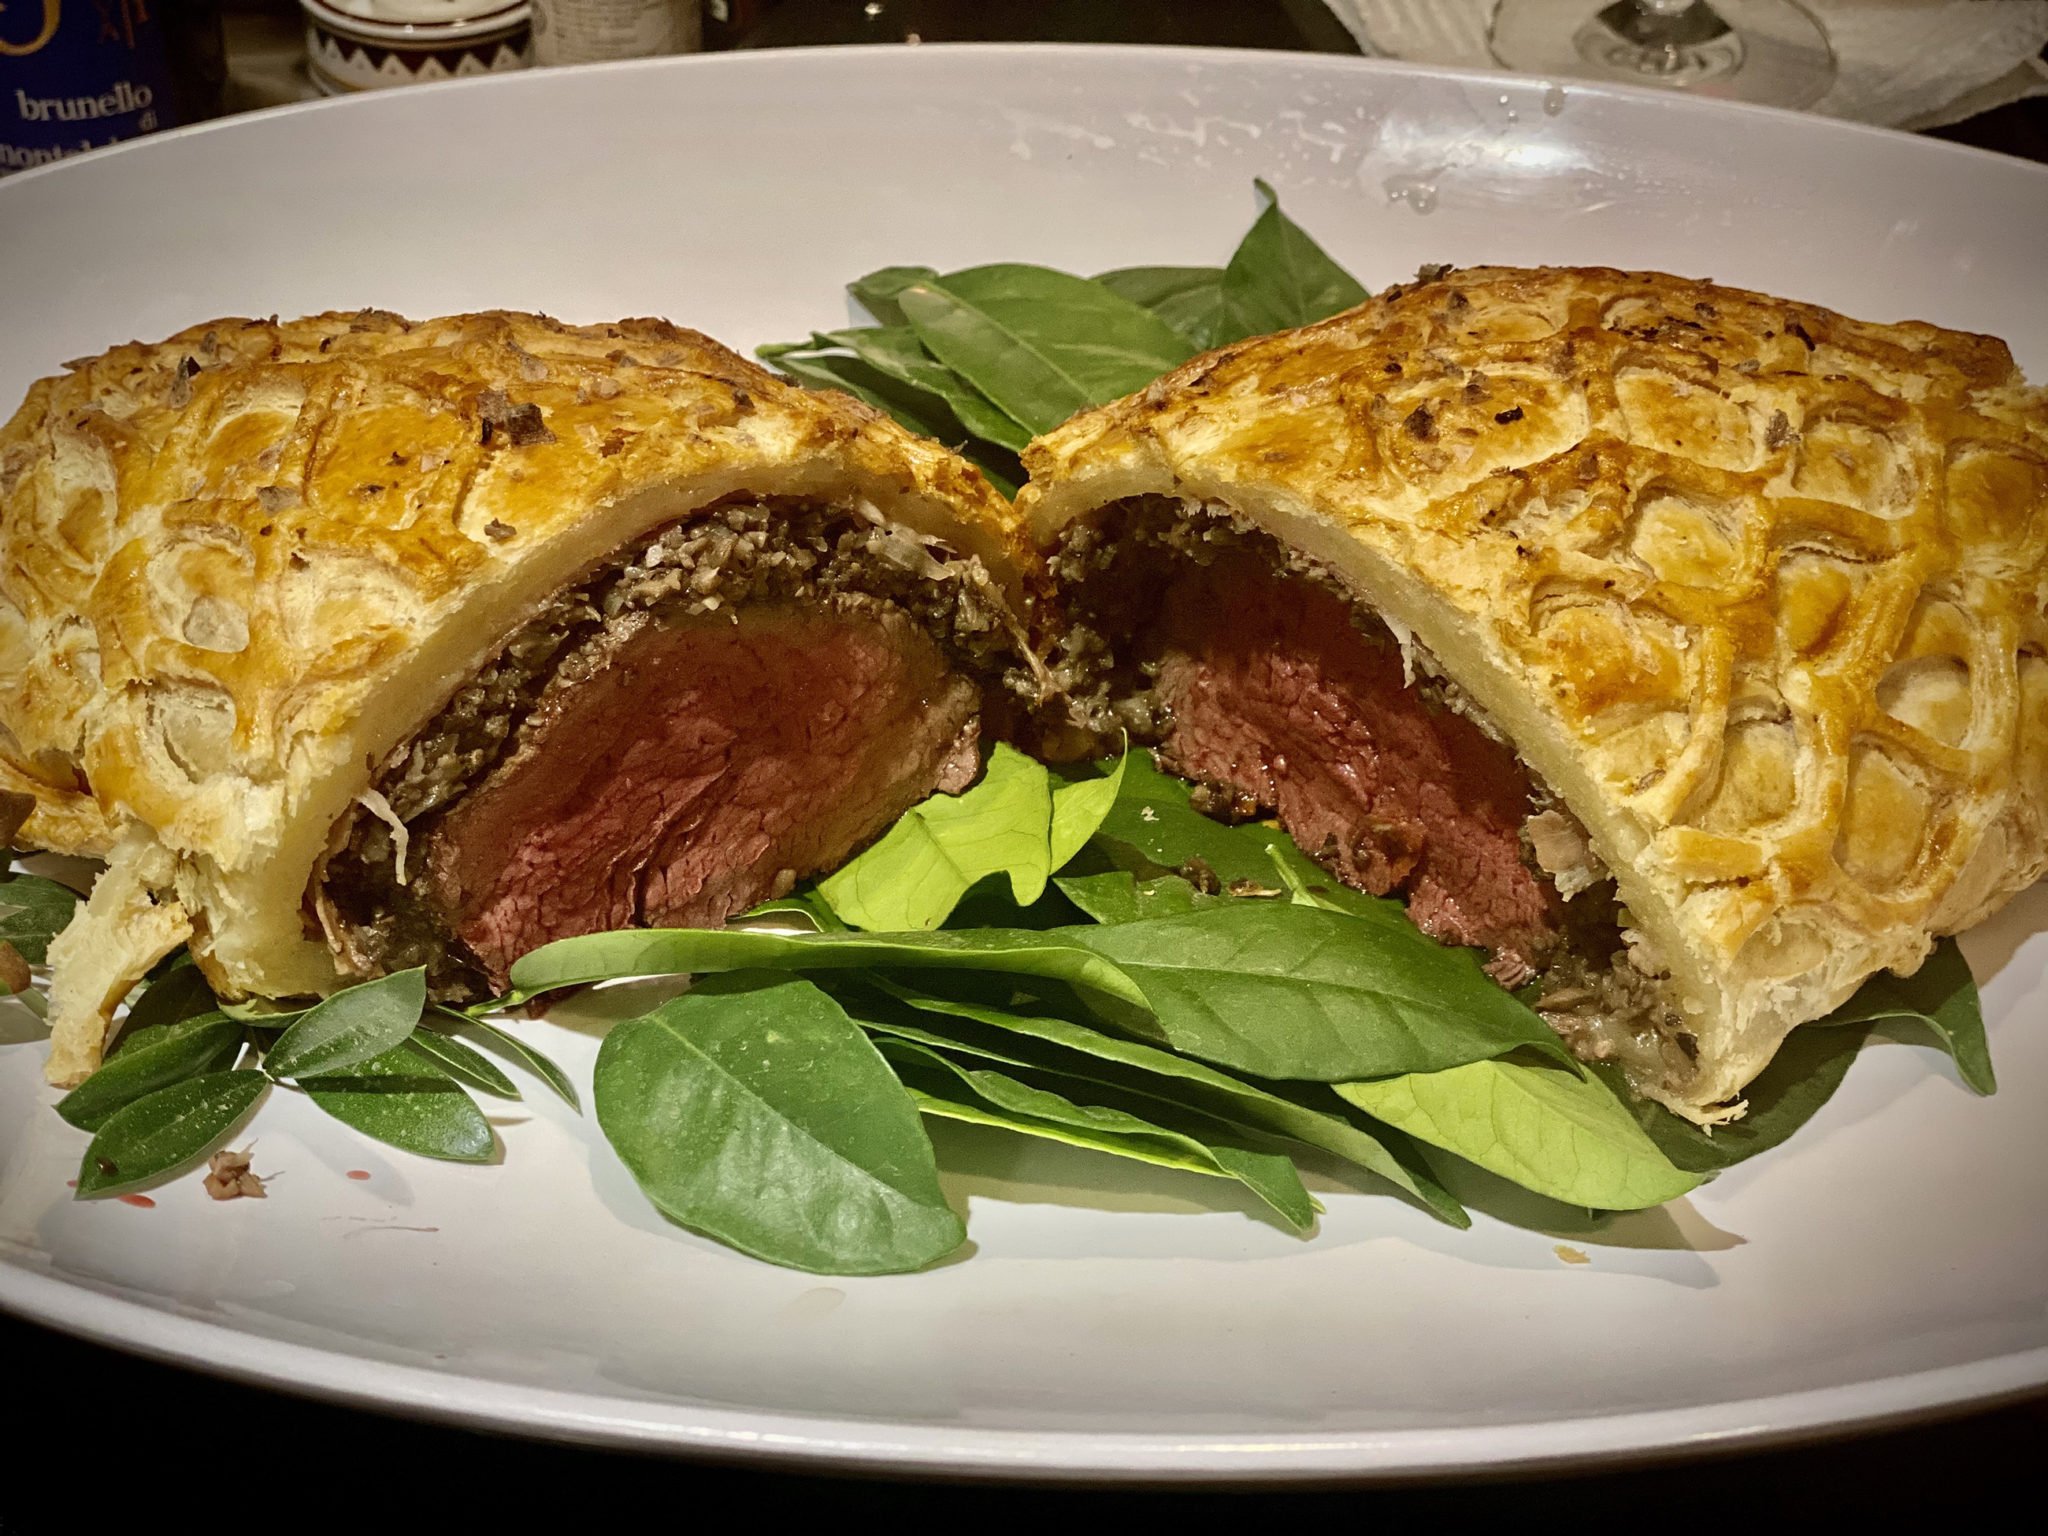
Mark’s Southwest Beef Wellington

This dish will wow your guests and has recently become a holiday favorite in the Candelaria family. The key to success with Beef Wellington is patience while assembling the dough lattice and cooking the meat to the perfect temperature. That moment when you cut it open in front of your guests and reveal the delicious meat and mushrooms inside is like opening a fabulous present! This meal is certainly a gift to enjoy and we will be doing so for our family’s Christmas dinner this year.

INGREDIENTS

Southwest Rub
• 2 to 3 tbsp olive oil
• 2 finely chopped shallots
• 3 finely chopped garlic cloves
• 1 pound of finely ground button mushrooms
• 2 tsp of red chile powder
• ½ tsp of black pepper
• ¾ tsp of salt
• ¼ cup of bourbon

Beef
• 3 to 3 ½ pound beef tenderloin cut from the thick part of the tenderloin—not the ends—well cleaned of all fat
• 1 tsp of red chile powder
• ½ tsp of ground cumin
• 1 tsp of salt
• 3 tbsp avocado oil
• ¼ cup of Dijon mustard
• 4 ounces of thinly sliced prosciutto
• 3 sheets (18-ounce) of puff pastry, thawed if frozen, but still cold
• 2 beaten egg yolks combined with 1 tbsp of water

PREPARATION

Southwest Rub
• In a large sauté pan over moderate heat, add the oil and sauté the shallots and the minced garlic until they are translucent and soft, about 5 minutes.
• Then add the ground mushrooms, red chile powder, salt and pepper, and the bourbon. Cook until the mushrooms have released whatever moisture they have left, and the mixture has become dry and paste-like; this will take about 10 minutes or so. Remove from the pan and let the mixture cool.

Beef Preparation and Assembly
• Season the beef with salt, chile powder and cumin.
• In a very hot cast iron pan, sear the beef in avocado oil browning all the sides.
• Remove the beef and let cool. Brush all sides with the mustard.
• On a floured surface, roll out one puff pastry sheet slightly to make a rectangle that is about 2 to 3 inches larger on each side of the width of your beef. Place the other sheet in the refrigerator until needed.
• Layer the prosciutto on the puff pastry sheet in an area that is the same size as the beef. Top the prosciutto with about ¼ of the mushroom mixture.
• Place the beef on top of the prosciutto and mushroom mixture and cover the beef with the remaining mushroom mixture. Layer the remaining prosciutto on top of the mushroom mixture so that the beef is completely encased.

• Roll the puff pastry around the beef and fold up around the sides. Brush the pastry with the egg wash.
• If needed, place the extra sheet of puff pastry on top of the beef, pressing it around the beef so that it overlaps the bottom sheet that was folded up the sides to encase the beef. Press the two sheets together so they make a tight fit. Roll up the encased beef in plastic tightly and place in the refrigerator for 30 minutes so that it firms up.
• After 30 minutes in the fridge, place the beef on a well-greased baking sheet, preferably with a wire rack so any moisture will not be pooling.
• Brush the beef roll with the egg wash and then get a third sheet of puff pastry and use your dough lattice cutter to make your dough lattice which you will lay over the entire top side of the beef pastry roll. Brush the top pastry with more egg wash for a nice golden color finish.

• Bake in a 425-degree oven for 40 minutes. Remove from the oven and check with your meat thermometer for a temperature of 120 degrees. If not to temperature, place back in oven and then check every 5 minutes until the meat reaches 120 degrees.
• When done and removed from the oven, let it rest for 15 minutes on a wire rack wrapped in foil before serving.
• Transfer to a serving dish and garnish with roasted vegetables and diced parsley.

Enjoy & please post & tag @candelariadesign on Instagram if you make our recipe!

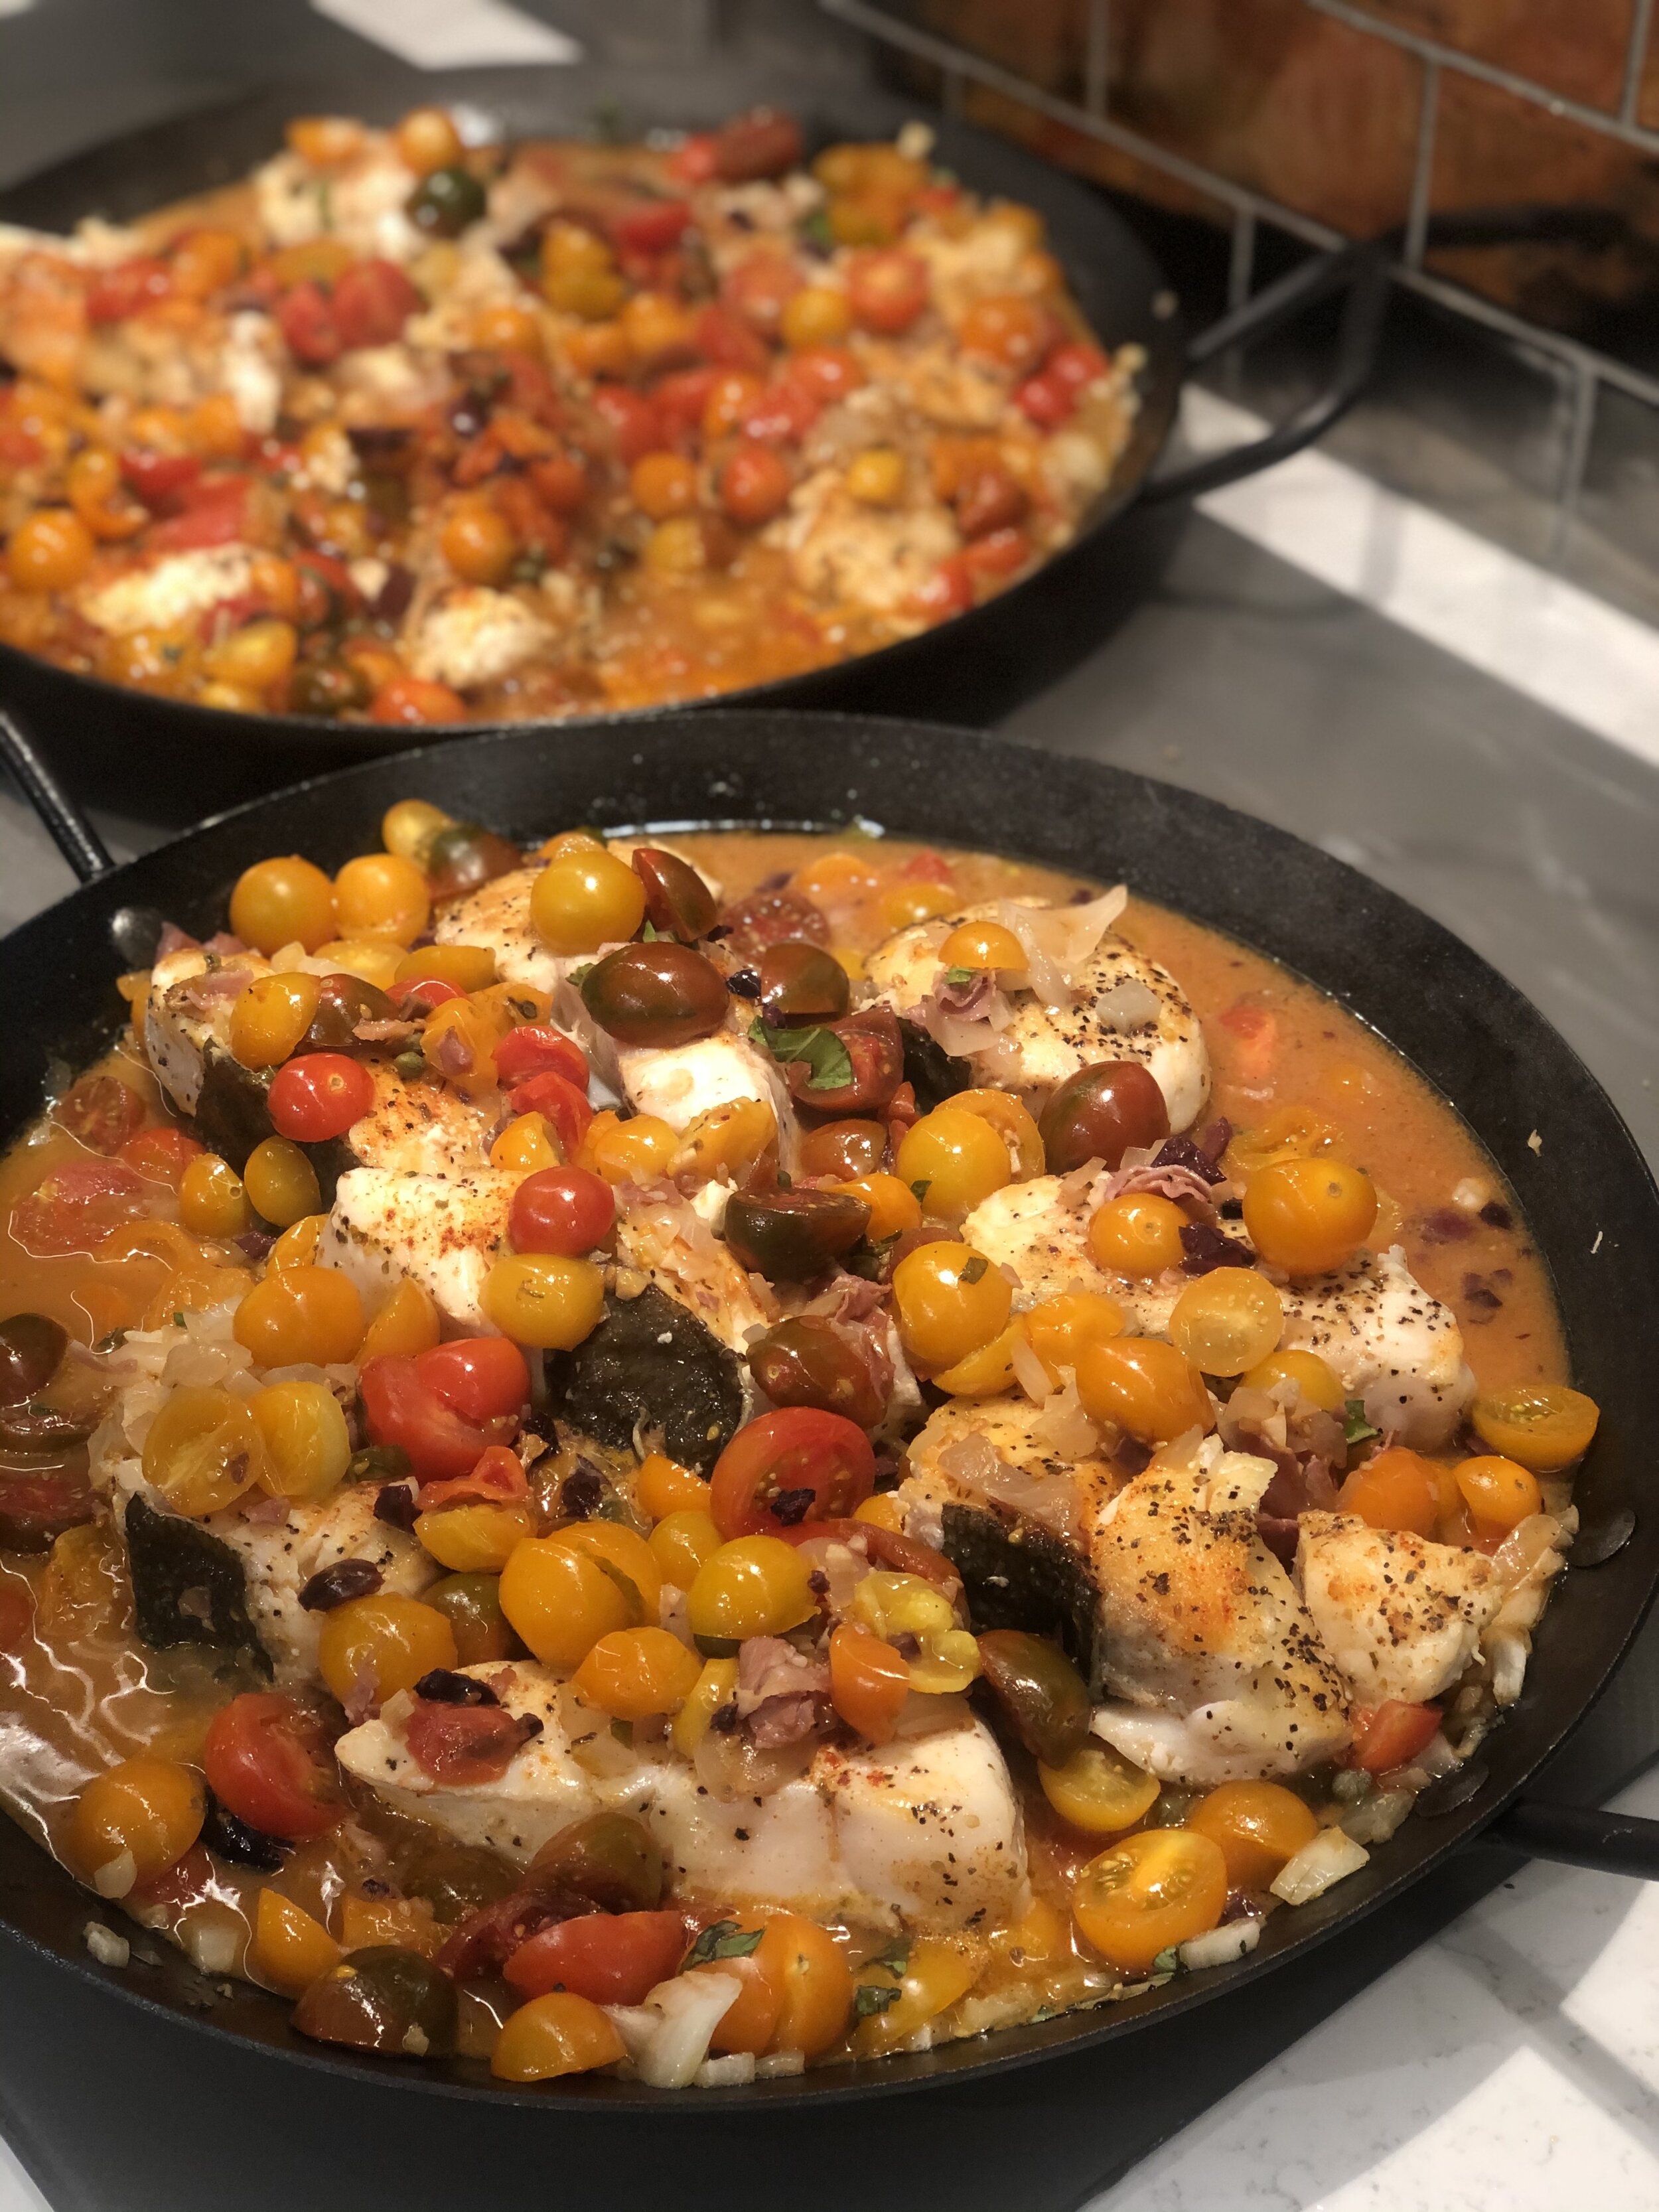
Mark's Classic Halibut Puttanesca

Here is a favorite Italian seafood dish that I love to make for my pescatarian clients and friends.

HalibutPuttanescaPans.jpg

INGREDIENTS

• Olive oil and a tablespoon or two of butter.

• 4 to 6 – 4” square Halibut filets – skin on or off is your preference

• ½ onion chopped or 2 chopped shallots

• 6 cloves of garlic, diced

• 1 tsp or a dash of red Chile pepper flakes

• 2-3 slices of prosciutto diced (eliminate for pescatarians)

• 1 pint of cherry tomatoes sliced lengthwise or as many as you want to fill your pan

• 1/3 cup of dry white wine

• 1/3 cup of Kalamata olives

• 1/3 cup of rinsed capers

• ¼ cup of fresh squeezed lemon juice

• zest of ½ a lemon

• Kosher salt and finely ground fresh pepper

• Tsp of fresh chopped thyme

• 1 tbsp of chopped fresh flat leaf Italian parsley

• Lemon wedge for garnish

HalibutPutanesscaDish.png

PREPARATION

• Dry your filets and salt and pepper all sides.

• In a high-sided saucepan set over medium high heat warm the olive oil and butter. Brown the fish on both sides for about 2 minutes so it has a nice golden color. Remove from the pan and set on a clean plate and cover with foil to keep warm.

• In the same skillet add the onion or shallots and the garlic and cook until translucent and soft. Then sprinkle in the red Chile flakes.

• Next add your prosciutto if desired and let this cook and crisp up slightly.

• Now toss in your cherry tomatoes and white wine and let the tomatoes cook and soften about 7-10 minutes.

• Add the Kalamata olives, capers, and lemon juice along with the lemon zest, salt and pepper to taste and cook this all down into a nice sauce.

• Let this simmer and thicken up and then nestle the halibut filets back in adding some of the tomato sauce over the top of the fish so the fish is covered.

• Cook the fish about 5 minutes with a cover on the pan to basically steam the fish.

• Serve immediately and garnish with the chopped Italian parsley, sprinkles of the red Chile pepper flakes and a lemon wedge. Serve over my homemade pasta (see Chapter 3).

Four Fundamental Sauces by Jennifer Johnson

Organic Chef Jennifer Johnson joined us on our March Cooking Class and taught us how to make four fundamental sauces: Pomodoro, Hollandaise, Ancho Chili Cream, and Chocolate sauce.⁠⁠ Jennifer runs an organic farm to table catering company in Phoenix called Witnessing Nature in Food and was featured on our podcast in February. She spoke about the food we find in stores, what costs and standards are required by farmer’s produce to be certified organic, why eating fresh, organic, local food is so important and how to make delicious meals. Her and Mark also discussed their favorite local chefs, restaurants, farmers markets, their travels, and favorite cooking shows.

Screen Shot 2021-03-17 at 3.36.33 PM.png

Pan Seared Scallops with Chef Cory Oppold

This month, Mark and Tiffany Candelaria will be joined by Chef Cory Oppold former winner of Food Network’s Chopped, and founder of Course, an in-home dining and catering company.

Cory is known for designing his dishes into masterpieces and in this cooking class he will teach us one of his signatures: Seared Scallops with cornbread pudding, zucchini, fennel soubise, and tomato coulis. He will also walk us through the art of plating this delicious dish and why presentation is important.

PAN SEARED SCALLOPS 

4 Large Scallops 

2 Sprigs of Thyme 

2 T Grapeseed Oil 

Salt tt 

2 T of Unsalted Butter 

1 Place a pan on High Heat. 

2 Add oil and wait for the oil to smoke. 

3 Season the Scallops and place in pan. 

4 Cook on 1 side for 2 minutes and nicely caramelized. 

5 Flip Scallops and add butter and thyme. Allow butter to caramelize while basting Scallops. 

6 Remove Scallops to a Paper Towel to drip before plating. 

Scallops.jpg

CORN BREAD PUDDING 

Cornbread

DRY INGREDIENTS 

1 Cup Yellow Corn Meal 

1 Cup A P Flour 

2 T Sugar 

4 t Baking Powder 

½ t Salt 

WET INGREDIENTS 

1 Cup milk 

1 Egg 

¼ Cup Vegetable Oil 

1 Mix All Dry Ingredients 

2 Mix All Wet Ingredients 

3 Mix wet into Dry. 

5 Place into pan and bake for 20 minutes at 400 degrees. 

6 Cool in pan 

CORNBREAD PUDDING

BASE 

3 Cups Milk 

¼ Cup Cream 

1 Cup Sugar 

2 Cups Roasted Corn Cocoa Powder 

2 Garlic Cloves 

7 Eggs 

1 t Salt 

1 Puree all BASE ingredients in a blender till smooth 

2 Pour BASE on cubed Corn Bread and allow to soak for 1 hour. 

3 Transfer Soaked Bread to a Food Processor and Puree till smooth 

4 Pour Mixture into a baking dish and cover with foil 

5 Place pan into a water bath and bake for 1 hour at 325 degrees. 

6 Chill and Cube 

7 Heat to order. 

FENNEL SOUBISE 

1 whole Fennel 

1 Onion 

2 T Butter 

½ Cup Milk 

1 t Grape seed Oil 

Salt to taste

Red Wine Vinegar  

1 Heat Butter with 1 cup of water 

2 Slice Onion thinly and cook in butter water with a pinch of salt on low heat till melted with no color till the onions are melted. Add more water if needed so no color develops. 

3 Cut Off Stalk of Fennel and pick nice Fennel fronds. 

4 Chop Fennel Stalks and Place in pot and Cover with water. Bring to Boil and Simmer for 30 minutes to make fennel stock. Turn off heat and allow the stock to sit till ready for use. 

5 For the Fennel Bulb – Thinly Slice a couple Slices of Fennel From the top and reserve in cold water for garnish. Slice the rest of the fennel and toss with 1 t of oil and salt. Place in tightly sealed aluminum foil and cook at 350 degrees for about 45 minutes or until the fennel is tender. 

6 When Fennel is tender, add to the onion mixture. Strain Fennel Stock over top and bring to a simmer. 

7 Add ½ Cup of Cream. 

8 Place Mixture in a blender and blend on high speed till smooth. Season with salt and Red Wine Vinegar. Strain.


CONFIT TOMATO COULIS 

5 Roma Tomatoes, Peeled and Quartered 

5 Sprigs of Thyme 

1 Cup Grape seed Oil 

Salt to taste

Red Wine Vinegar  

1 Scatter Thyme on a ½ Sheet Tray and Lay Tomatoes evenly across “Cut Side Up”. 

2 Pour Oil over top and season with Salt. 

3 Place into a 225 Degree oven for 6-8 Hour to lightly Dry. 

4 When the tomatoes are lightly dried, Separate the tomatoes in a container. 

5 Strain the oil. 

6 Place the Tomatoes in a blender with ½ cup of water. 

7 Blend on high speed till smooth. Turn Blender to low and slowly drizzle in the oil to emulsify. Season with salt and Red Wine Vinegar. 

PLATING 

4 Cooked Scallops 

Fennel Velouté 

4 Cubes of Corn Bread Pudding (Heated in Oven till Hot) 

Tomato Coulis (Warm in Squirt Bottle) 

4 Baby Zucchinis Blanched, Warmed and Seasoned 

Shaved Fennel tossed with Oil and Seasoned. 

Fennel Fronds (Garnish) 

Sprigs of baby Parsley (Garnish) 

Instant Pot® Cheesecake with Toppings with Chef Jessica Williams

Cheesecakecookingclass.png

Join Mark & Tiffany Candelaria for December’s cooking class with special guest chef, Jessica Williams. They will be making a delicious, yet easy holiday treat, Cheesecake in the InstantPot! They also make two tasty toppings on the stove, cherry compote and caramel sauce. Full recipe and instructions below, and watch them prepare this in the Candelaria Design kitchen in the video button below!

Ingredients:

For the crust:

4 oz.  graham crackers

1 Tbs firmly packed light brown sugar

1 tsp ground cinnamon

4 Tbs unsalted butter, melted

For the filling:

1 lb cream cheese, at room temperature

3/4 cup granulated sugar

1/4 cup sour cream, at room temperature

2 eggs, at room temperature

2 tsp. fresh lemon juice

1 tsp. vanilla extract

Pinch of kosher salt

Instantpot cheesecake.jpg

Preparation:

To make the crust, in a food processor, combine the graham crackers, cinnamon and brown sugar and pulse to fine crumbs. Add the melted butter and pulse until combined. Press the mixture firmly in the bottom of a 7-inch round springform pan. Set aside.

To make the filling, in a stand mixer fitted with the paddle attachment, combine the cream cheese, granulated sugar and sour cream and beat on medium speed until smooth, about 3 minutes. Stop and scrape down the sides of the bowl. Add the eggs, lemon juice, vanilla extract and salt and beat on medium-high speed until evenly blended, about 1 minute. Pour the filling into the prepared crust.

Pour 2 cups water into an Instant Pot and insert the steam rack. Using a foil sling, lower the cake pan onto the rack. Tuck the foil ends over the cake, lock the lid in place, and turn the valve to “sealing.” Set the Instant Pot to pressure cook at high pressure for 28 minutes.

Once the pressure cooking is complete, let the steam release naturally for 15 minutes, then turn the valve to “venting” to release any residual steam. Remove the lid and, using the sling, lift out the cake pan. Let the cake cool, then cover and refrigerate until set, about 2 hours.


Cherry Compote:

1/2 cup sugar

1 lb fresh or thawed frozen cherries, pitted 

1 strip lemon zest

2 tsp. cornstarch

In a saucepan over medium heat, combine the sugar and 1/2 cup water. Bring to a simmer and cook, stirring, until the sugar is dissolved, about 3 minutes. Add the cherries and lemon zest, bring the liquid back to a simmer and cook until the cherries are slightly softened but still hold their shape, about 2 minutes.

In a small bowl, stir together the cornstarch and 2 Tbs. water until the cornstarch is dissolved. Stir the cornstarch mixture into the simmering cherries and cook, stirring gently, until the liquid is clear and slightly thickened, about 1 minute. Transfer the compote to a bowl, remove and discard the lemon zest, and let the compote cool to room temperature.

Caramel Sauce:

1 cup granulated sugar

6 Tablespoons salted butter, room temperature

1/2 cup heavy cream

1 teaspoon salt

Heat granulated sugar in a medium saucepan over medium heat, stirring constantly with a high heat resistant rubber spatula or wooden spoon. Sugar will form clumps and eventually melt into a thick brown, amber-colored liquid as you continue to stir. Be careful not to burn.

Once sugar is completely melted, immediately add the butter. Be careful in this step because the caramel will bubble rapidly when the butter is added.

Stir the butter into the caramel until it is completely melted, about 2 minutes. If you notice the butter separating or if the sugar clumped up, remove from heat and whisk to combine. Keep whisking until it comes together.

Stir in 1/2 cup of heavy cream. Since the heavy cream is colder than the caramel, the mixture will rapidly bubble when added. Allow the mixture to boil for 1 minute. It will rise in the pan as it boils.

Remove from heat and stir in 1 teaspoon of salt. Allow to slightly cool down before using.

Appetizers with Chef Eddie Matney

Chef Matney with Mark, October 11, 2020

Chef Matney with Mark, October 11, 2020

This month’s virtual cooking class, Mark celebrates his milestone 60th birthday! As a special treat for both Mark and his viewers, he invited his friend and well-known Chef, Eddie Matney to lead the cooking class! Matney teaches us how to make some amazing appetizers, Blistered Tomato & Brie Bruschetta, Steak Tartar and Watch the tutorial video below to see the special birthday cooking class and Chef Matney’s recipes!

3F4A4984.jpg

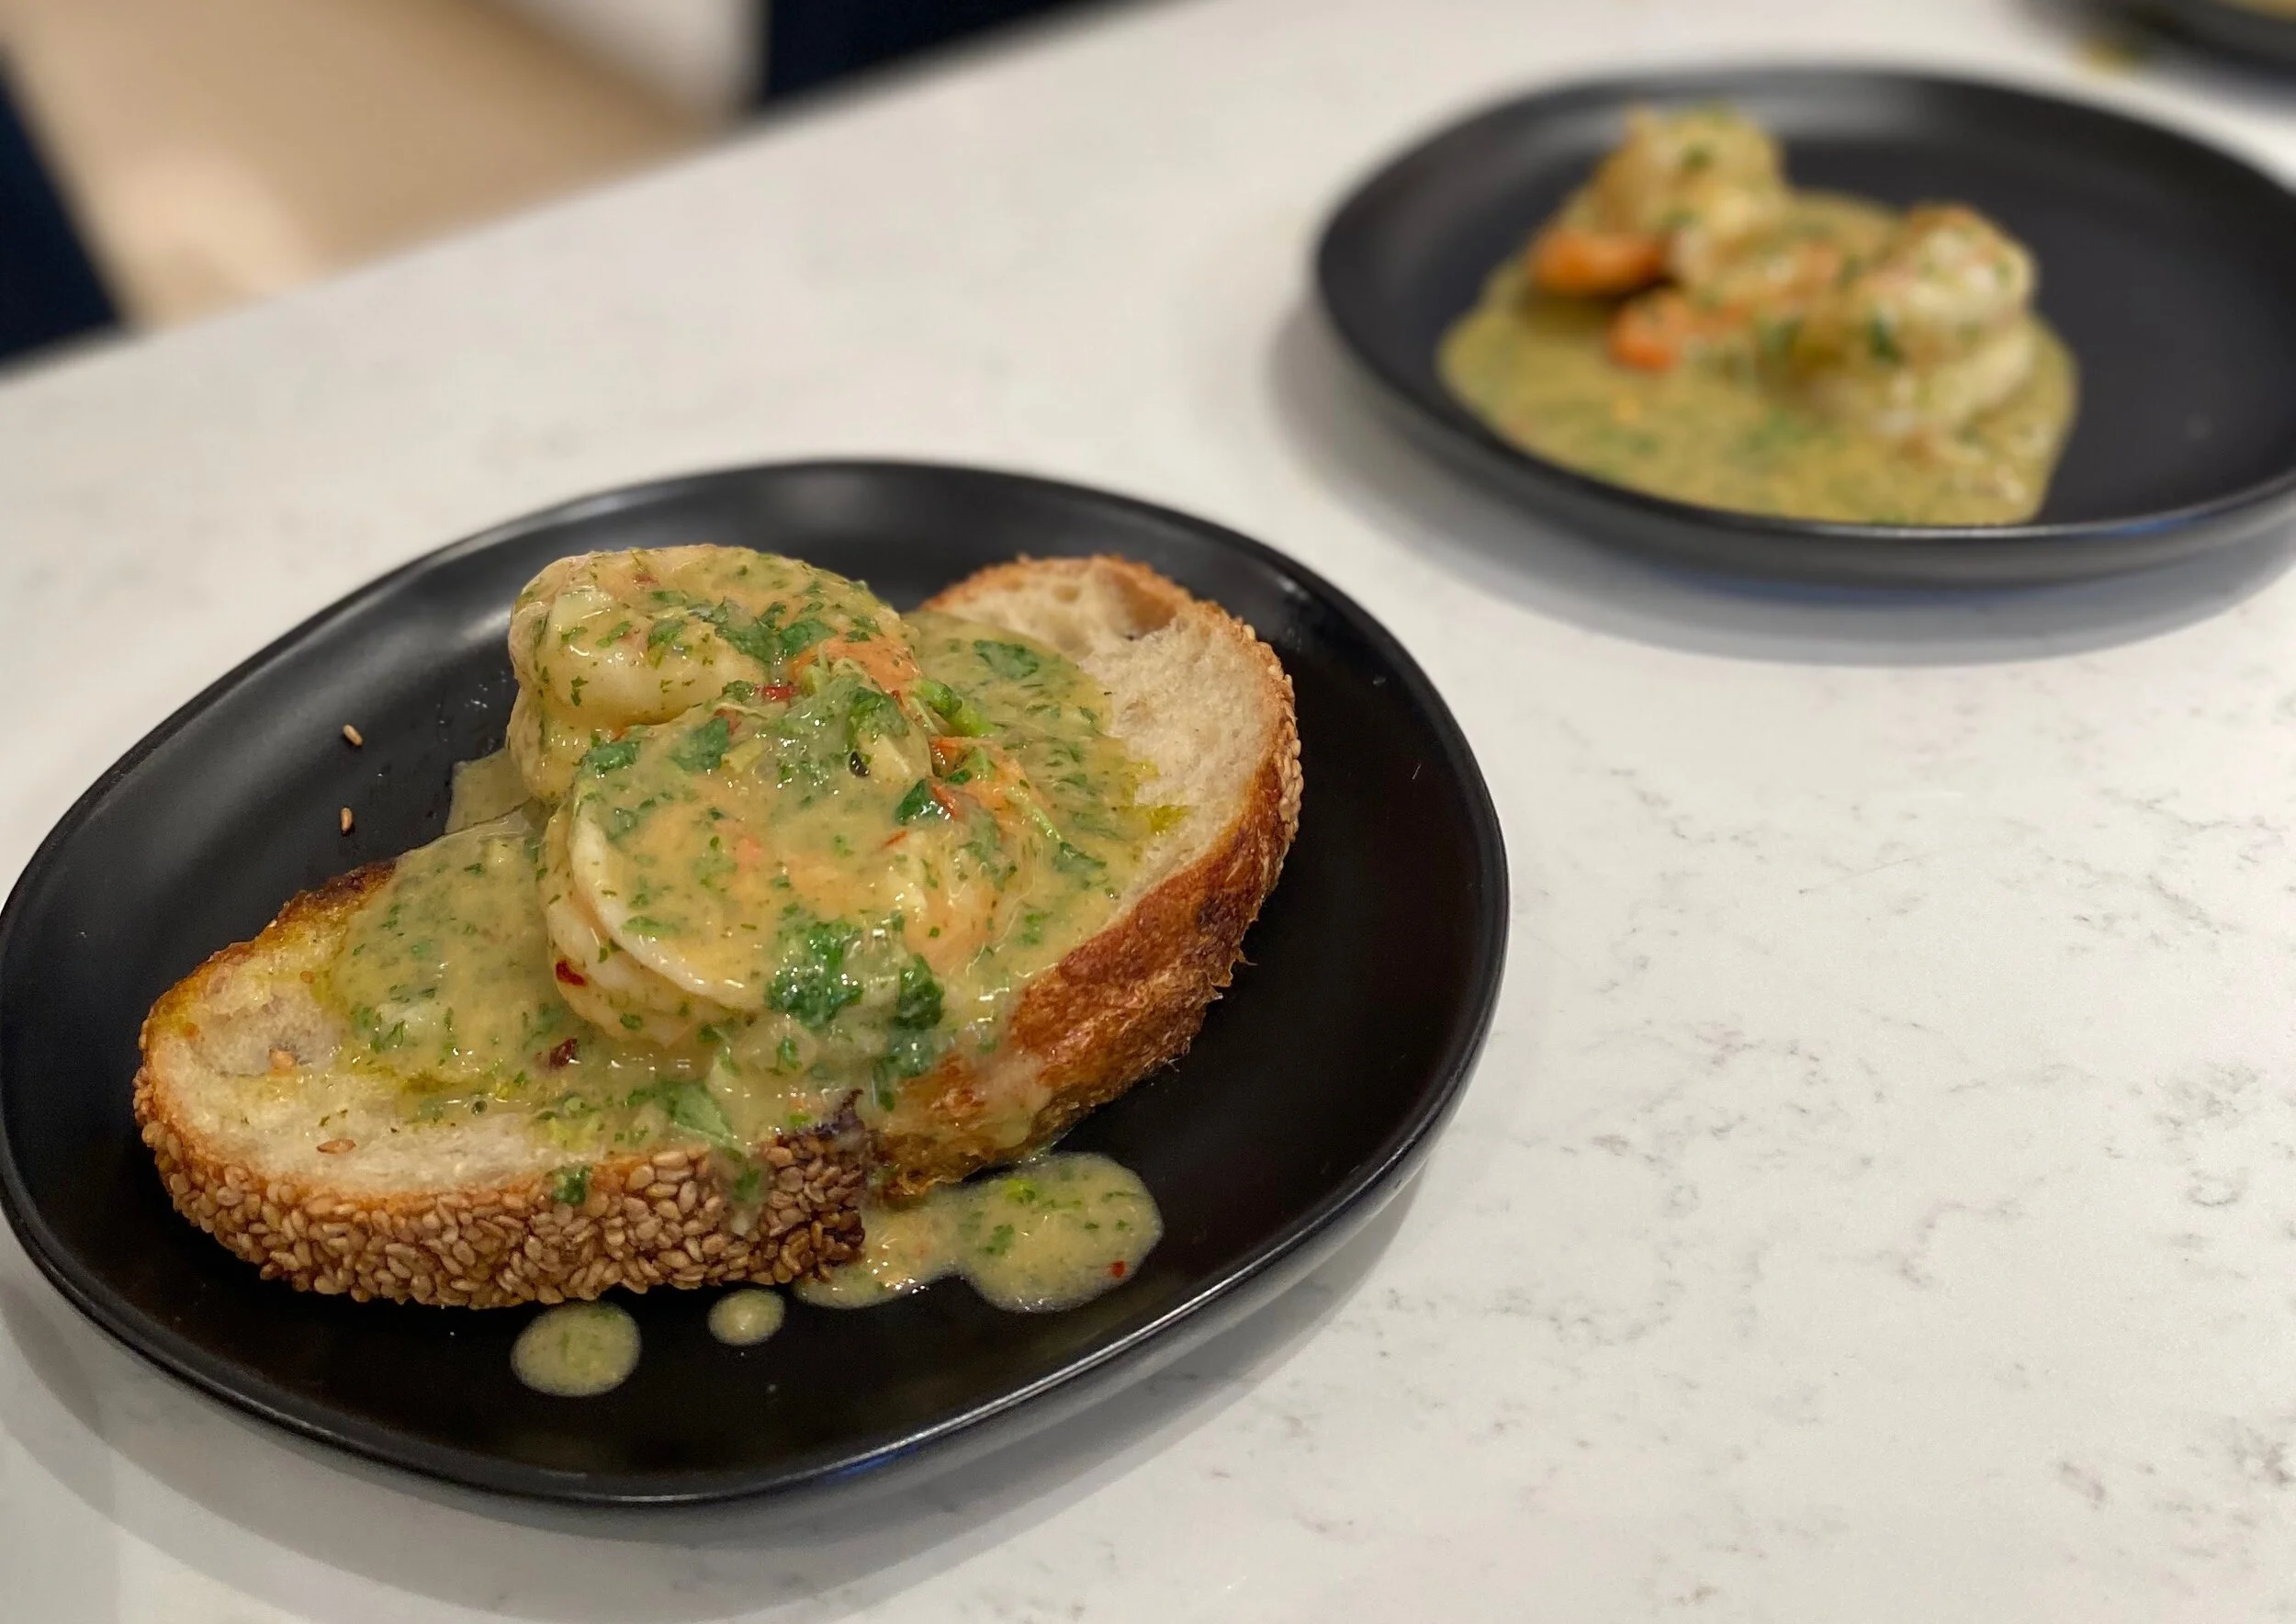
Moroccan Sautéed Shrimp with Charmoula

Ingredients:

Chermoula:

2cups Cilantro (stems and all)

MoroccanShrimp.jpeg

1cup Mint (leaves picked)

1 Shallot (chopped)

2 Garlic Cloves

2tbs Dijon Mustard

2 Limes (juiced)

1tsp Red Chili Flakes

1tbs Coriander (ground)

1tbs Cumin (ground)

2cups Olive Oil

Pinch of Salt & Pepper

Shrimp:

1lb Large White Shrimp (peeled and deveined)

1tbs Shallot (chopped)

1/2tbs Garlic (chopped)

1 light Beer

2tbs Worcestershire

1tbs Butter (cubed)

1 Loaf good crusty bread to absorb the sauce

Preparation:

  • Combine first 10 ingredients in a blender, pulse 3-4 times or until emulsified. (you want the

chermoula slightly chunky, don't blend too fine). Set aside.

  • Slice bread into long slices and toast or grill with oil, salt and pepper, until crispy. Set aside.

  • Heat a large pan with oil, sweat shallots and garlic until translucent.

  • Add shrimp and sauté for 1 minute, add half of beer and Worcestershire and reduce for 2-3 minutes or until shrimp is almost cooked through.

  • Remove from heat and spoon in about 1 cup of chermoula, add in cold butter to emulsify the sauce.

  • Place crusty bread in a bowl or dipped plate, spoon shrimp and sauce over top and enjoy.


Chef Eddies Kibbie Neh Steak Tartare

Ingredients:

3F4A5066.jpg

4oz Prime Filet Steak

1tbs Red Onion

½ tbs Serrano Chili

2 Basil Leaves

2 Mint Leaves

Pinch of Sumac

Drizzle of Olive Oil

Pinch of Salt and Pepper

2 Pitas

Preparation:

  • Gather all ingredients except Pita on a cutting board. Stack all ingredients and chop until meat and veggies are finely diced and incorporated.

  • Lightly drizzle or pain pita with olive oil and lightly grill or toast until golden brown and crisp. Cut into triangles and serve alongside the tartare.


BlisteredTomatoes.jpg

Blistered Tomato and Brie Bruschetta

Ingredients:

2 cups Cherry Tomatoes (halved)

1 Shallot (finely diced)

4 Garlic cloves (finely diced)

½ cup Prosciutto (chopped)

3tbs Sherry Vinegar

2tbs Brown Sugar

1tbs Basil (chopped)

Creme De Brie

Loaf of nice sourdough bread (we love Noble)

Preparation:

  • Heat a large saute pan with oil, saute prosciutto until crispy, add your cherry tomatoes, shallots,

and garlic and cook until tomatoes are broken down and in a sauce consistency.

  • Turn heat to low and add in sherry vinegar and brown sugar, cook for 2-3 minutes, or until

thickened. Hold hot on the stove.

  • Cut bread into medium sized pieces about ½ inch thick, grill or toast until golden and crispy.

  • Top toasted bread with a dollop of Creme De Brie and bake in the oven at 350 degrees until the

cheese is melty and hot. Remove from the oven and place on a plate, spoon on blistered tomato

jam and garnish with arugula if desired.

Butternut Squash & Chicken Red Chile Enchiladas

BSquashEnchFinal.JPG

Ingredients

1-Rotisserie chicken 

18 corn tortillas

Red Chile (store bought or homemade-Mark’s recipe here)

Olive Oil

1 yellow onion

2 tbs butter

2 packages frozen butternut squash 

10oz shredded cheddar cheese

Sour cream

Small bunch of cilantro

Preparation

  • Debone and shred the rotisserie chicken.

  • Defrost the butternut squash

  • Dice the yellow onion. 

  • Melt the butter in a large sauté pan and add the onion. Saute until onions are slightly translucent. Add the butternut squash and cook on medium for about 3 minutes.

  • Add the chicken and cook all together for about 10 minutes. 

  • Coat a large baking pan with olive oil. Dip the corn tortillas in the Red Chile sauce and slightly overlap them on the bottom of the baking dish. Sprinkle with cheese.

  • Add a layer of the butternut squash and chicken.

  • Add 3-4 spoonfuls of Red Chile to the top of that layer and repeat another layer.

  • End with a top layer of tortillas topped with cheese.

  • Bake at 350 degrees for 35 minutes.

  • Let rest for 5 minutes and serve with Sour Cream, more Chile sauce and cilantro!

BSquashEnch1.JPG
BSquashEnch2.JPG
BSquashEnch3.JPG

Creamy Tuscan Salmon Recipe & Video

This easy, but delicious recipe was introduced to me by my daughter Tiffany when she made it for us while on vacation in Oregon this summer. I was truly blown away, and not just because she did all the cooking. This dish is packed full of flavor and only requires one pan. Prep and cleanup is a breeze and the meal is amazing, I suggest serving it with pasta or rice. Click the button below to watch the YouTube video of Tiffany and I preparing this dish on our monthly virtual cooking class!

Tiffany adapted this recipe from eatwell101.com

Tiffany adapted this recipe from eatwell101.com

Ingredients

3 salmon fillets or 1 half salmon divided

2 tsp olive oil

2 tbsp butter

5 cloves garlic, finely diced

1/4 cup (80ml) vegetable broth

1/4 cup (80ml) white wine

1 tbs Dijon mustard

5 oz (150g) jarred sun-dried tomato in oil

1 1/3 cups heavy cream

Salt and pepper, to taste

3 cups baby spinach leaves

1/2 cup grated Parmesan

1 tbs fresh Italian parsley, chopped

Preparation

  • Heat the oil in a large skillet over medium-high heat. Season the salmon filets on both sides with salt and pepper, and sear in the hot pan, flesh-side down first, for 5 minutes on each side, or until cooked to your liking. Once salmon filets are cooked, remove from the pan and set aside.

  • In the same pan, melt the butter in the remaining cooking juices leftover. Add in the garlic and fry until fragrant (about one minute). Add the sun-dried tomatoes with some of their oil and fry for 1-2 minutes so they release their flavors.

  • Then, pour in the vegetable broth and wine, and allow the sauce to reduce down slightly.

  • Reduce heat to low, add the heavy cream and Dijon and bring to a gentle simmer, while stirring occasionally.

  • Add the grilled salmon filets back into the pan along with the spinach and grated Parmesan. Allow dish to simmer for a further minute until cheese melts and spinach slightly wilts.

  • Serve and spoon the sauce over each filet and sprinkle with parsley.

TuscanSalmon.JPG

Caprese Burgers & Bacon S'mores with our Squirreltail Cocktail

We came up with these recipes while vacationing in the small town of McMinnville, Oregon. We rented a great house through AirBnB to escape the heat and the COVID-19 for the month of July and it’s been wonderful! Our yard has a 75 year-old Douglas Fir tree, a grape vine, rambunctious squirrels, and a nice fire pit in the center of it all surrounded by Adirondack chairs. So this month’s virtual Instagram Live cooking class will be a “Campfire Edition”, held on Saturday, July 4th at 10am, with everything cooked fireside on the Weber Grill. We hope to “see” you Saturday on our Candelaria Design Instagram.

Mark&TiffMcMinnFire.jpg
4thJulyBurgers&Cocktail.jpg

Caprese Burger Ingredients

Makes 4 burgers

1 1/2 lbs ground sirloin beef

1—2 tbs Worcestershire

1 1/2 teaspoons kosher salt

1/2 teaspoon freshly ground black pepper

7 — 8oz ball fresh mozzarella sliced into eight 1/4-inch-thick slices, patted dry with paper towels

1/2 cup mayonnaise

1/4 cup pesto

Olive oil for drizzling

4 Focaccia hamburger buns

2 medium tomatoes sliced into 1/4-inch-thick rounds

Fresh Basil leaves

Caprese Burger Preparation

  • For the burgers: Place a grill pan over medium-high heat or preheat a gas or charcoal grill.

  • Combine the beef, Worcestershire, salt and pepper in a large bowl. Form the mixture into four, 4-inch-diameter patties, each about 3/4-inch thick.

  • Grill for 5 minutes. Turn the burgers over and place a slice of mozzarella on top. Cook for about 5 minutes longer until the burgers are cooked through and the cheese is slightly melted.

  • Allow the burgers to rest for 5 minutes.

  • For the pesto mayonnaise, combine the mayonnaise and pesto in a small bowl until smooth.

  • To assemble the burgers: Drizzle the cut side of the bread with olive oil and grill until lightly toasted, 1 to 2 minutes. Spread the pesto mayonnaise over the bottom halves of the grilled bread. Place the burgers on top and add 2 tomato slices and basil leaves. Add the top halves of the bread and serve.

S'mores.jpg

Bacon S’mores Ingredients

Graham crackers

Marshmallows

Chocolate Bar 

Bacon

Preparation

  • Break graham crackers in half. Break chocolate bar in half and center one square section on each of 2 graham cracker halves.

  • Cook bacon strips on grill 3-5 minutes until desired texture.

  • Roast marshmallow over the grill about 1 minute until desired char.

  • Top each graham cracker half with your roasted marshmallow & 1/2 a bacon strip. Add other graham cracker half and press gently to sandwich.

  • Enjoy!

Squirrel Tail Cocktail

SquirrelTailIngredients.jpg

2 shots Bourbon

1 shot Chambord Liqueur

1/4 shot Frangelico Liqueur

1 shot Club Soda

Few drops of Aromatic Bitters

1 blackberry

Pour all ingredients into a cocktail shaker. Shake and serve over ice. Garnish with a small Pine branch. Enjoy that Squirreltail!

SquirrelTail.jpg

Mashed Sweet Potatoes with Green Chiles

Here’s a super simple, yet decadently delicious recipe that we should really make more often at the Candelaria household! This Father’s Day, we’ll be pairing these mashed sweet potatoes & green Chile with our family’s favorite, braised short ribs, which we make extra easy by using an electric pressure cooker, also known as the Instant Pot.

You can find our short rib recipe here on the Recipe page as well as a video of Mark & Tiffany Candelaria walking you through all the steps!

ShortRibsFinal1.JPG

Ingredients

5—6 medium sweet potatoes, peeled and cut into 1-inch pieces

1 cup light sour cream or Low-Fat Blend

1/2 cup (1 stick) unsalted butter, softened

1 4oz can chopped green chiles

3/4 teaspoon salt

1/4 teaspoon pepper

Preparation

  • Add cut potatoes to the pot and add water to cover. Bring to a boil and cook for 12 minutes or until fork tender.

  • Drain and return potatoes to the pot. Add the sour cream, butter, chiles, salt, and pepper. Mash with the potato masher until smooth. Add more salt and pepper to taste. Serve warm.

Tips

These can be made ahead! Place mashed potato mixture into greased 2 quart baking dish and keep in the refrigerator for up to two days. Bring to room temperature, then top with 1 tablespoon of butter cut into small pieces. Bake uncovered at 350° F for 35 minutes.

Braised Short Ribs Recipe & Video

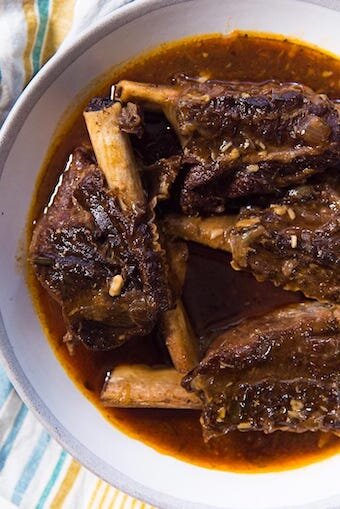
This recipe is one of the Candelaria kids’ favorite meals that Mark makes. He’s been making this recipe and perfecting it for years, but only recently, with the commercial success of the modern pressure cookers, has he adapted this recipe to be made in half the time! Here we have an absolutely delicious dish for four, that Mark serves with either his Porcini Risotto (recipe below) or mashed potatoes. View his Mashed Sweet Potatoes with Green Chile recipe by clicking here.

ShortRibsRisotto.jpg

Traditionally, making risotto is a slow, hands on dish that requires constant stirring and adding hot stock. I’ve been making it at home with my family this way for years, but with the introduction of the Instant Pot, all of this has changed. Here is the recipe I use to make risotto in a pressure cooker, it is so simple and quick that it feels like cheating, but it’s as tasty as the traditional way and so much easier!

Risotto Ingredients

RisottoIngredients.jpg

1/4 cup unsalted butter

1 cup chopped onion or shallots

1/4 cup olive oil

3 cups diced mushrooms (I use dried Porcini from Italy, which you need to reconstitute in hot water first - save the broth for the Instant Pot)

1 rosemary sprig

1 1/2 cups Arborio rice

3/4 cup white wine

1 quart chicken or vegetable stock

Salt and ground black pepper to taste

1/2 cup grated Parmesan cheese

Risotto Recipe

  • Select the Saute function on an electric pressure cooker. Add butter and olive oil; stir until butter melts, about 2 minutes. Add mushrooms; cook, stirring occasionally, until slightly softened, about 3 minutes. Stir in onion; cook for 2 minutes. Add rosemary sprig; cook for 1 minute.

  • Stir rice into the pot until each grain is coated with butter-olive oil mixture, about 2 minutes. Pour in wine; simmer for 3 minutes. Pour in chicken stock and some of your mushroom broth if you reconstituted dry mushrooms, stirring to scrape the sides of the pot. Simmer for 1 minute.

  • Close and lock the lid. Turn the venting knob to sealing. Select high pressure according to manufacturer's instructions and set timer for 6 minutes, or select medium pressure for 8 minutes. Allow 10 to 15 minutes for pressure to build.

  • When pressure cooking is finished, tap venting knob a few times with a wooden spoon or spatula. Turn the knob to point at Vent to release pressure. Remove lid when pressure is released, about 5 minutes.

  • Stir risotto until creamy, about 1 minute. Discard rosemary sprig. Season with salt and pepper. Stir in Parmesan cheese until melted and combined. Enjoy!

Short Rib Ingredients

  • 6 lbs short ribs/about 8. (Serves 4)

  • Salt to season generously

  • 1 medium onion 

  • 1 tbsp paprika

  • 1 tsp cayenne pepper or 2 tsp if you prefer it spicier

  • 3 tbsp brown sugar

  • 3 tbsp balsamic vinegar

  • 6 cloves of garlic

  • 2 - 3 fresh thyme sprigs

  • 1 cup beef stock 

  • 1/2 cup red wine

  • 1 tbsp cornstarch (cornflour)

  • 1 tbsp water

  • Italian or curled parsley for garnish

Short Rib Recipe

ShortRibs-raw.jpg
  • Fill a large bowl or pot with cold water. Immerse the short ribs, and rinse the ribs in the cold water to wash off excess blood and bone dust.

  • Drain and pat dry the short ribs with paper towels. Generously sprinkle salt on all the ribs, on both sides.

  • Switch on the Instant Pot to the saute setting on high. When the instant pot is hot, pour about 2 tbsp of oil.

  • When the oil is hot, place about 3 - 4 short ribs in the instant pot to caramelize or to sear. It's important not to overcrowd the bottom in order to get nice caramelization on your short ribs.

  • Sear the short ribs on all sides, about 2 - 3 minutes per side. Place the caramelized short ribs on a plate.

  • Repeat with the rest of the short ribs.

  • For the next step, you will only need about 1 tbsp of oil in the instant pot. Discard the excess oil if there's more than 1 tbsp of it in the instant pot at this point.

  • Place the thickly sliced onion in the pot, and add some wine to de-glaze the bottom of the instant pot and make sure that all of the caramelized bits on the bottom are mixed with the wine (de-glazing is an important step, so don't skip it).

  • Add the paprika, cayenne pepper, sugar and balsamic vinegar. Then switch off the saute function on your instant pot.

  • Place the short ribs back in the instant pot and add the garlic, thyme and a pinch of salt (how much salt to add at this point depends on how well you seasoned the short ribs earlier - be careful not to over-salt, since you can always add more salt at the end if needed).

  • Pour the stock over the short ribs. Close the instant pot. Choose the manual high pressure function and set it to high. Cook the short ribs for 45 minutes, followed by a 10 - 15 minute natural release.

Instant-Pot-Short-Ribs-2534.jpg
  • Gently remove the short ribs on to a plate, and turn the saute function back on for the liquid/broth in the instant pot.

  • Dissolve the cornstarch in the water and add it to the liquid/broth in the instant pot. Mix it in and bring it to a simmer until the liquid has thickened. Taste and season the liquid with more salt or balsamic vinegar, if needed.

  • Transfer the short ribs back into the instant pot and switch off the saute function.

  • Optional step - once the short ribs have cooled off, place your instant pot cooker pot in the fridge (covered). Leave it overnight, or for at least 4 hours, until the fat has solidified on the surface. Then remove this layer of fat, and reheat the short ribs in the instant pot.

  • Serve atop your homemade mushroom risotto and garnish with Italian parsley!

Osso Bucco

One of my favorite dishes is Osso Bucco, a dish featuring a cross-cut veal shank braised with vegetables, white wine and broth.  It’s garnished with a gremolata which is a combo of garlic, lemon zest and parsley and served over risotto. The word Osso Bucco means Osso (bone) with a Bucco (hole) referring to the bone hole that is filled with marrow. I absolutely love this dish, and accompanied by a big Brunello wine, I am in heaven!

It may sound like this would be a complicated dish, but quite the contrary - it is easy to prepare, it just needs time to cook! For my birthday once, I made 12 occo bucco shanks, read about that in my blog post here. This recipe will walk you through how to make osso bucco for 4 and I highly recommend it for a nice small dinner party at your home. You will blow your guests away!

Ossobucco-final.jpeg

Ingredients

4 - 1 1/2 inch thick veal shanks - about 10-12 ounces each

1/4 cup of olive oil/butter

3 teaspoons of salt

1 1/2 teaspoons of freshly ground pepper

1/4 cup of gluten free flour

1/3 cup finely chopped pancetta

1 1/2 cups of chopped onions

1 cup of chopped carrots

3/4 cup of chopped celery

1 1/2 tablespoons minced garlic

2 bay leaves

4 teaspoons chopped fresh rosemary leaves

1 1/4 cups of red wine - use a good one!

1 cup of diced canned tomatoes

3 cups of beef broth

1/4 cup of chopped fresh Italian parsley leaves

Preparation

Ossobucco2.jpeg
Ossobucco5.jpeg

  • Place 1/4 cup of olive oil or butter or combo of each in a Dutch Oven on the stove. While the oil is heating up, season the veal shanks with 1 1/2 teaspoon of salt and 3/4 teaspoons of pepper and dredge in the flour to coat. I used gluten free flour so everyone could enjoy.

  • Remove any excess flour by giving the shanks a gentle shake -shake the shank! When the oil is almost smoking, add the shanks and cook until well browned on all sides - I make sure the edges are browned too. Transfer the shanks to a plate and cover with foil.

  • Now add the pancetta, celery, carrots and onions to the pan and cook using a wood spoon to scrape the meat bits free. Cook, stirring occasionally, until the veggies are soft yet still firm and lightly browned about 4-5 minutes.

  • Add the garlic, bay leaves, rosemary and remaining salt and pepper and cook for about a minute. Add the wine - you can add red or white - I like red. Stir to combine with the veggie mixture.

  • Now add the crushed or diced tomatoes and beef stock and then return the shanks into the Dutch Oven and get them bathed in the goodness.

Ossobucco6.jpeg
Ossobucco7.jpeg
  • Bring the mixture to a boil and then cover and reduce the heat to medium low and cook, covered, for 3 hours or when the shanks are soft and tender and starting to fall away from the bone.

  • Make sure you open that Brunello in the morning so it has all day to breathe. Serve hot and enjoy!

Let's make Paella!

It’s no secret that Mark is widely and well known for his Paella making skills. Whether he is making it for a weekend dinner at home with Isabel or for a crowd of 300, it never disappoints! Recently, Food Network’s Iron Chef Mark Tarbell bestowed the opinion of “the best paella I’ve ever had”!….now that’s a serious compliment!

paellalt.jpg

Ingredients

3 Chicken legs
3 Chicken thighs
1 teaspoon dried oregano
2 tablespoons paprika
Kosher salt and freshly ground pepper
1/4 cup of extra-virgin olive oil
1 Spanish chorizo sausage

2 Andouille Sausages
4 garlic cloves, diced
1 Spanish onion, diced
1 (16 ounce) can dice tomatoes
1 cup of Arbiorto Rice
1 teaspoon of saffron threads
2-3 small cans of chicken broth
1/4 cup Spanish Sherry

1 halibut filet or cod filet
6 jumbo shrimp peeled with tails on and deveined.
1 lobster tails
6-8 clams, scrubbed
6-8 mussels, scrubbed and debearded.
1/2 cup sweet peas, frozen and thawed
Fresh flat-leaf parsley leaves for garnish
Lemon wedges for serving

Preparation

The key to this dish is a great paella pan. Pick one up at William Sonoma - they are an essential piece of equipment. I start with three key components - dark meat chicken, halibut or cod, and chorizo - Spanish if you can find it. If you can't find chorizo I use andouille sausage from AJ's or Safeway or I use them all.

I make a little mixture of oregano, paprika, salt and pepper in a bowl and dredge the chicken and fish in this mixture and let them sit for about 30 minutes.

Next I heat up some olive oil in the paella pan over medium-high heat. Place the chicken, chorizo and fish in the pan, skin side down and brown on all sides, turning with tongs when browned. The chorizo will turn the oil a nice red color which will add to the rice color eventually. Once everything is browned, remove it to a platter lined with paper towels.

Lower the heat on the pan to medium, and now you will work on the rice. I like to use arborio rice which is an Italian short-grain rice from the Po Valley - generally used for risotto - but great for paella.

I start by using the oil and drippings in the pan by adding garlic, onion, tomatoes, salt and pepper and cook everything down until the mixture caramelizes and the flavors all blend together.

You then fold in the rice, stirring to coat the grains. Let the rice heat up and almost fry in the mixture. Add the signature ingredient, saffron strands, by stirring these in.

Now pour in chicken broth and simmer for 10 minutes, gently moving the pan around so the rice cooks evenly and absorbs the liquid just like in a risotto (the only difference is you do not want to cover the dish or stir constantly).

After the 10 minutes of cooking the rice down, add the shrimp, lobster, clams, mussels and then add the chicken, fish and chorizo back in the mix. I like to cut the fish and chorizo into small pieces or slices so it gets nicely distributed throughout the paella. Tuck in all of the pieces and add more broth if you feel the paella is getting too dry - but you don't want it soupy either.

I then add a little sprinkle throughout of Spanish sherry for flavor. Let the whole thing simmer without stirring until the rice is al dente, about 15 - 20 minutes.

I then scatter frozen peas over the top and continue to cook for 5 more minutes, until the paella looks fluffy and moist, shrimp are nice and pink, and the clams and mussels begin to open. The bottom of the pan might form a toasted rice bottom called a socarrat - it is delicious.

Remove the paella from the heat and let rest for 5 minutes.

Garnish with parsley and lemon wedges and enjoy!

mark+paella.jpg

Grandma Karin's German Dinner & Vanilla Pudding with Cherry Compote

BEEF ROLLUPS (Rindsrouladen)

  • Sirloin steaks, sliced thin, about 3/16 inch thick. The slices should be about 7 inches wide and 10 to 11 inches long each.

  • Salt & Pepper to taste (or make your own blend of spices)

  • Spread a good quality mustard (I prefer German mustard) on one side of steaks.

  • Lay down 1/2 strip of bacon

  • Add a strip of dill pickle (I prefer German dill, but Clausens is the closest to German pickles)

  • Add a strip or a few slices of sweet pickles

  • Pickled pepper and onions

  • A strip of pickled pimento (the stuffing can be anything you prefer)

  • Roll everything up and secure with a large tooth pick

  • Brown the Rouladen in coconut oil on all sides, remove and make sauce

  • Add some onions and sauté slightly, deglaze with red wine. Add Mushrooms, Beef broth, Marjoram, Pepper and Allspice to taste.

  • Return Rouladen to sauce, simmer until done (1 to 1 1.5hrs)

  • Last 1/2 hour add some sour cream. Add salt and pepper if needed, and thicken with cornstarch if needed.

  • Lastly I like to add a good dab of butter and remove from heat.

  • Remove Rouladen and plate.

Serve with Red Cabbage (Rotkohl)

  • Shred red cabbage fairly fine, shred some onions, (red, white or shallots).

  • Shred some apple , set aside.

  • Sauté some chopped bacon and add chopped apples. Add extra coconut oil if needed, add some Bay leaves, fresh if available.

  • Add Cabbage, salt, pepper, Allspice, and some brown sugar to taste.

  • Add enough apple cider vinegar or Red Wine to simmer.

  • Simmer in open pot until Cabbage is soft.

  • Remove Bay Leaves and serve

Serve with Salt Potatoes, (may also serve with German spaetzle, a pasta dumpling, or potato dumpling or what ever you prefer).

  • Peel & salt potatoes, (Russet work best) about 1 medium potato per person.

  • Cut to bite sizes, place in pot, cover with cold water, add salt and boil until potatoes are soft but not mushy.

  • Drain all water, add potatoes back to pot, return to burner and shake potatoes in pot until mealy, fluffy.

Vanilla Pudding Dessert

  • Prepare Vanilla pudding per box instructions.

  • Top with fruit compote and a dab of whip cream. For this occasion I used frozen cherries and added a little Rum, sugar, almond extract, lemon juice and simmered until soft. If too much liquid remains, I add a little cornstarch dissolved in water to thicken.

IMG_1692.jpeg

Italian Tiramisu Recipe & Video

Tiramisu.jpeg

Italians know how to make a delicious meal, and dessert is no exception! One of their most popular desserts and one of our favorites is the creamy, cocoa meets coffee creation known as Tiramisu. Let us help you bring this traditional Italian dessert to life in your kitchen - no baking necessary!

Watch Mark & Tiffany Candelaria walk you through the whole process!

Ingredients:
Zabaglione
1/8" cup of heavy cream
1/4" cup of semisweet chocolate chips
4 large egg yolks
1/3 cup of sugar
1/3 cup of Marsala wine or Vin Santo
Pinch of salt

Tiramisu
1- 8 ounce tub of Mascarpone Cheese
3/4 cup of heavy cream
2/3 cup of sugar
2 cups of coffee or espresso
32 Savolardi ladyfinger cookies.
Unsweetened Cocoa powder sifted over the top.


Recipe
Start by warming up 1/8" cup of heavy cream in a sauce pan just so its warmed over medium heat. Remove from the heat and add the chocolate chips and stir until smooth. Keep warm.

IMG_0326.jpg
  • Then in a metal bowl add the sugar, egg yolks, pinch of salt, and Marsala wine and whisk them together.

  • While doing this I get a large pot with about 2" of water heating up. Get this hot but not boiling - just steaming nicely. Place the metal bowl over the pot and keep whisking the mixture. Use a thermometer and keep whisking until the mixture is thick like a custard and the temperature of the custard is around 160º to 165º. Don't let the eggs scramble! Whisk away.

IMG_0327.jpg
  • When you hit 160º take the metal bowl off the heat and whisk a bit more so the custard is nice and thick like a soupy pudding.

  • Fold in the chocolate chip mixture so they are all combined and chill the metal bowl in the fridge.

  • This is a great dessert on its own with fruit in a dessert cup!

Tiramisu3.jpeg

Tiramisu
1- 8 ounce tub of Mascarpone Cheese
3/4 cup of heavy cream
2/3 cup of sugar
2 cups of coffee or espresso
32 Savolardi ladyfinger cookies.
Unsweetened Cocoa powder sifted over the top.

  • Take the heavy cream and 1/3 cup of sugar and whip this into stiff peaks. Then stir in the Mascarpone Cheese and mix. If you have an electric mixer that is the way to go for perfect consistency.

  • Next, add the Zabaglione mixture we just prepared and mix that in. Get it all smooth and incorporated.

Tiramisu4.jpeg
  • Line a 9-1/2" x 5" x 2-1/4" bread pan with plastic wrap. Then take the coffee and dissolve 1/3 cup of sugar and combine.

  • Dip one cookie at a time into the coffee very quickly so they do not get too soggy and line the bottom of the pan with the sugar side down.

  • Line the entire bottom with the dipped cookies and then spread half of the Zabaglione mixture over the top with a spatula.

  • Then add another layer of dipped cookies. Add the final half of the Zabaglione mixture over the top and then a final third layer of dipped cookies.

Tiramisu5.jpeg
  • Wrap the whole thing with plastic wrap and let sit in the fridge for about 6 hours to set.  

  • When ready to serve, unwrap the top, flip the pan over on a decorative plate and unwrap the plastic wrap from the bottom (now the top). Sift some unsweetened cocoa over the top, slice and serve!

IMG_0332.jpg

Candelaria Design Pasta Making Class

Join us for our first Candelaria Design Cooking Class as we make homemade pasta from scratch in our new Candelaria Design Demonstration Kitchen! Our Pasta Recipe is the very first recipe listed on this Recipe page, or you can click right here!

Enjoy and post your pasta making pictures on our Instagram Page @candelariadesign.

Click on the YouTube video below to view the class!

142986013.jpg