Inspiring Living Lifestyle

Enjoy these wonderful recipes from our travels, our family’s and our favorite cookbooks.


Chicken Mole Two Ways: Sweet & Spicy

In this episode of Cooking with the Candelaria’s, our Project Manager and our 2023 MVP Pablo Moncayo shows us how to make a chocolate mole and a spicy mole. Mole means 'sauce' in Spanish and is a traditional sauce and marinade originally used in Mexican cuisine. Moles come in various flavors and ingredients, with chili peppers as the common ingredient. The classic mole version is the variety called mole poblano, which is a dark red or brown sauce served over meat.

Ingredients for the chicken:

  • 4 chicken breasts

  • 2 garlic cloves

  • ½ white onion

  • 1 chicken flavor bouillon cube

  • 5 cups of water

  • Salt/Pepper to taste

  • Cloves to taste

  • 3 “chile del arbol” dry peppers (only if making spicy mole)

Preparation for the chicken:

  1. Place the chicken pieces in a stockpot with all the ingredients.

  2. Place the pot over medium-high heat, and once it comes to a boil, reduce the heat and simmer for 35-45 minutes until the chicken meat is cooked and tender.

  3. Keep the chicken broth to achieve the thickness you like for the mole sauce.

  4. While the chicken is cooking, prepare the mole sauce.


Ingredients for the spicy mole sauce:

  • 1 Jar of 8.25oz Doña Maria Mole

  • 2 cups of chicken broth

  • Toasted sesame seeds

  • 3 “chile del arbol” dry peppers without seeds

Ingredients for the sweet mole sauce:

  • 1 Jar of 8.25oz Doña Maria Mole

  • ½ tablet of Mexican Chocolate “Abuelita”

  • 1 coke can 12oz

  • ¼ teaspoon ground cinnamon

  • Toasted sesame seed

Mole Preparation

Spicy mole sauce:

  1. Mix all ingredients in a blender.

  2. Place a large frying pan over low heat and add the blended ingredients to the frying pan.

  3. Stir the paste until the mole paste has completely dissolved.

  4. Add more chicken broth as needed, the paste will get thicker as it continues cooking.

  5. Mix the shredded chicken and the diluted paste for 5 minutes and it’s ready to be served.

  6. Mole is typically served with tortillas, and a side of refried beans and rice.

Sweet mole sauce:

  1. Mix all ingredients in a blender, except for the coke.

  2. Place a large frying pan over low heat and add the blended ingredients to the frying pan.

  3. Stir the paste until the mole paste has completely dissolved.

  4. Add the coke while you stir the paste.

  5. Add more chicken broth if needed after the coke, the paste will get thicker as it continues cooking.

  6. Mix the shredded chicken and the diluted paste for 5 minutes and it’s ready to be served.

  7. Mole is typically served with tortillas, and a side of refried beans and rice.
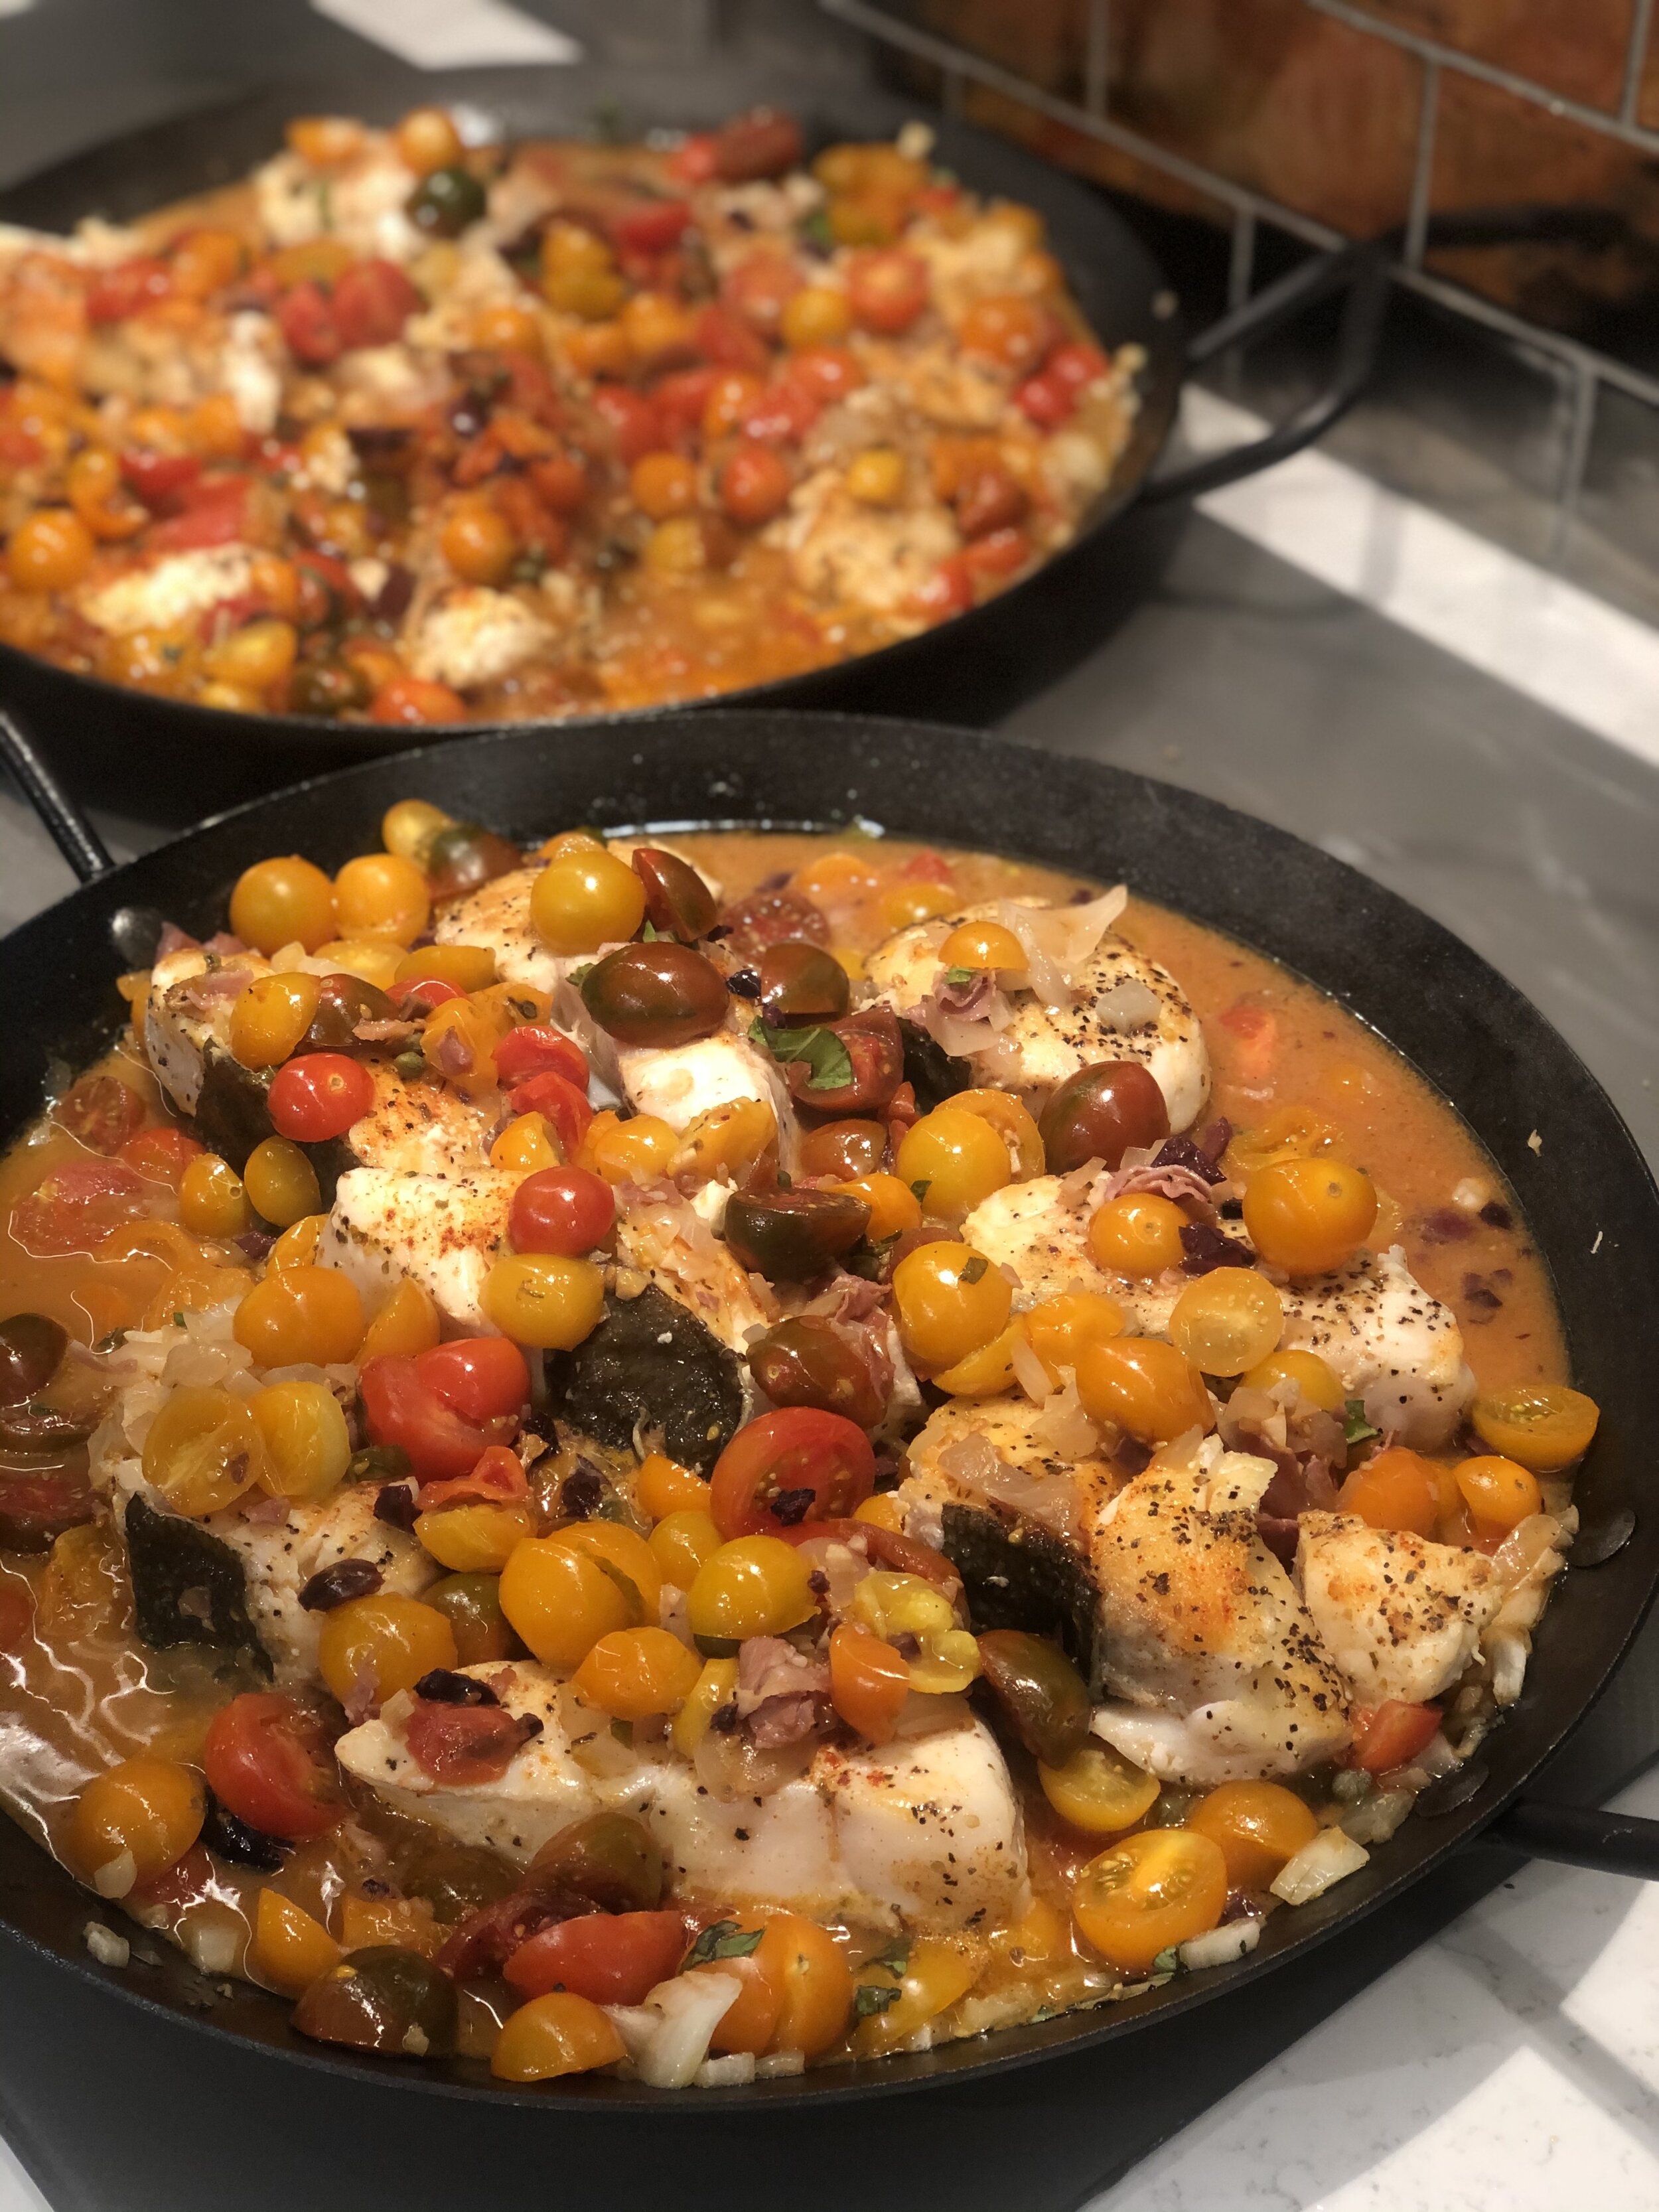
Mark's Classic Halibut Puttanesca

Here is a favorite Italian seafood dish that I love to make for my pescatarian clients and friends.

HalibutPuttanescaPans.jpg

INGREDIENTS

• Olive oil and a tablespoon or two of butter.

• 4 to 6 – 4” square Halibut filets – skin on or off is your preference

• ½ onion chopped or 2 chopped shallots

• 6 cloves of garlic, diced

• 1 tsp or a dash of red Chile pepper flakes

• 2-3 slices of prosciutto diced (eliminate for pescatarians)

• 1 pint of cherry tomatoes sliced lengthwise or as many as you want to fill your pan

• 1/3 cup of dry white wine

• 1/3 cup of Kalamata olives

• 1/3 cup of rinsed capers

• ¼ cup of fresh squeezed lemon juice

• zest of ½ a lemon

• Kosher salt and finely ground fresh pepper

• Tsp of fresh chopped thyme

• 1 tbsp of chopped fresh flat leaf Italian parsley

• Lemon wedge for garnish

HalibutPutanesscaDish.png

PREPARATION

• Dry your filets and salt and pepper all sides.

• In a high-sided saucepan set over medium high heat warm the olive oil and butter. Brown the fish on both sides for about 2 minutes so it has a nice golden color. Remove from the pan and set on a clean plate and cover with foil to keep warm.

• In the same skillet add the onion or shallots and the garlic and cook until translucent and soft. Then sprinkle in the red Chile flakes.

• Next add your prosciutto if desired and let this cook and crisp up slightly.

• Now toss in your cherry tomatoes and white wine and let the tomatoes cook and soften about 7-10 minutes.

• Add the Kalamata olives, capers, and lemon juice along with the lemon zest, salt and pepper to taste and cook this all down into a nice sauce.

• Let this simmer and thicken up and then nestle the halibut filets back in adding some of the tomato sauce over the top of the fish so the fish is covered.

• Cook the fish about 5 minutes with a cover on the pan to basically steam the fish.

• Serve immediately and garnish with the chopped Italian parsley, sprinkles of the red Chile pepper flakes and a lemon wedge. Serve over my homemade pasta (see Chapter 3).

Butternut Squash & Chicken Red Chile Enchiladas

BSquashEnchFinal.JPG

Ingredients

1-Rotisserie chicken 

18 corn tortillas

Red Chile (store bought or homemade-Mark’s recipe here)

Olive Oil

1 yellow onion

2 tbs butter

2 packages frozen butternut squash 

10oz shredded cheddar cheese

Sour cream

Small bunch of cilantro

Preparation

  • Debone and shred the rotisserie chicken.

  • Defrost the butternut squash

  • Dice the yellow onion. 

  • Melt the butter in a large sauté pan and add the onion. Saute until onions are slightly translucent. Add the butternut squash and cook on medium for about 3 minutes.

  • Add the chicken and cook all together for about 10 minutes. 

  • Coat a large baking pan with olive oil. Dip the corn tortillas in the Red Chile sauce and slightly overlap them on the bottom of the baking dish. Sprinkle with cheese.

  • Add a layer of the butternut squash and chicken.

  • Add 3-4 spoonfuls of Red Chile to the top of that layer and repeat another layer.

  • End with a top layer of tortillas topped with cheese.

  • Bake at 350 degrees for 35 minutes.

  • Let rest for 5 minutes and serve with Sour Cream, more Chile sauce and cilantro!

BSquashEnch1.JPG
BSquashEnch2.JPG
BSquashEnch3.JPG

Mashed Sweet Potatoes with Green Chiles

Here’s a super simple, yet decadently delicious recipe that we should really make more often at the Candelaria household! This Father’s Day, we’ll be pairing these mashed sweet potatoes & green Chile with our family’s favorite, braised short ribs, which we make extra easy by using an electric pressure cooker, also known as the Instant Pot.

You can find our short rib recipe here on the Recipe page as well as a video of Mark & Tiffany Candelaria walking you through all the steps!

ShortRibsFinal1.JPG

Ingredients

5—6 medium sweet potatoes, peeled and cut into 1-inch pieces

1 cup light sour cream or Low-Fat Blend

1/2 cup (1 stick) unsalted butter, softened

1 4oz can chopped green chiles

3/4 teaspoon salt

1/4 teaspoon pepper

Preparation

  • Add cut potatoes to the pot and add water to cover. Bring to a boil and cook for 12 minutes or until fork tender.

  • Drain and return potatoes to the pot. Add the sour cream, butter, chiles, salt, and pepper. Mash with the potato masher until smooth. Add more salt and pepper to taste. Serve warm.

Tips

These can be made ahead! Place mashed potato mixture into greased 2 quart baking dish and keep in the refrigerator for up to two days. Bring to room temperature, then top with 1 tablespoon of butter cut into small pieces. Bake uncovered at 350° F for 35 minutes.

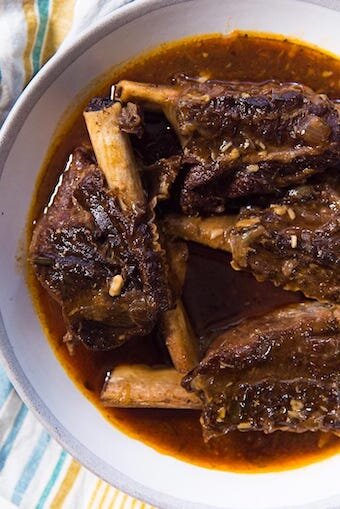
Braised Short Ribs Recipe & Video

This recipe is one of the Candelaria kids’ favorite meals that Mark makes. He’s been making this recipe and perfecting it for years, but only recently, with the commercial success of the modern pressure cookers, has he adapted this recipe to be made in half the time! Here we have an absolutely delicious dish for four, that Mark serves with either his Porcini Risotto (recipe below) or mashed potatoes. View his Mashed Sweet Potatoes with Green Chile recipe by clicking here.

ShortRibsRisotto.jpg

Traditionally, making risotto is a slow, hands on dish that requires constant stirring and adding hot stock. I’ve been making it at home with my family this way for years, but with the introduction of the Instant Pot, all of this has changed. Here is the recipe I use to make risotto in a pressure cooker, it is so simple and quick that it feels like cheating, but it’s as tasty as the traditional way and so much easier!

Risotto Ingredients

RisottoIngredients.jpg

1/4 cup unsalted butter

1 cup chopped onion or shallots

1/4 cup olive oil

3 cups diced mushrooms (I use dried Porcini from Italy, which you need to reconstitute in hot water first - save the broth for the Instant Pot)

1 rosemary sprig

1 1/2 cups Arborio rice

3/4 cup white wine

1 quart chicken or vegetable stock

Salt and ground black pepper to taste

1/2 cup grated Parmesan cheese

Risotto Recipe

  • Select the Saute function on an electric pressure cooker. Add butter and olive oil; stir until butter melts, about 2 minutes. Add mushrooms; cook, stirring occasionally, until slightly softened, about 3 minutes. Stir in onion; cook for 2 minutes. Add rosemary sprig; cook for 1 minute.

  • Stir rice into the pot until each grain is coated with butter-olive oil mixture, about 2 minutes. Pour in wine; simmer for 3 minutes. Pour in chicken stock and some of your mushroom broth if you reconstituted dry mushrooms, stirring to scrape the sides of the pot. Simmer for 1 minute.

  • Close and lock the lid. Turn the venting knob to sealing. Select high pressure according to manufacturer's instructions and set timer for 6 minutes, or select medium pressure for 8 minutes. Allow 10 to 15 minutes for pressure to build.

  • When pressure cooking is finished, tap venting knob a few times with a wooden spoon or spatula. Turn the knob to point at Vent to release pressure. Remove lid when pressure is released, about 5 minutes.

  • Stir risotto until creamy, about 1 minute. Discard rosemary sprig. Season with salt and pepper. Stir in Parmesan cheese until melted and combined. Enjoy!

Short Rib Ingredients

  • 6 lbs short ribs/about 8. (Serves 4)

  • Salt to season generously

  • 1 medium onion 

  • 1 tbsp paprika

  • 1 tsp cayenne pepper or 2 tsp if you prefer it spicier

  • 3 tbsp brown sugar

  • 3 tbsp balsamic vinegar

  • 6 cloves of garlic

  • 2 - 3 fresh thyme sprigs

  • 1 cup beef stock 

  • 1/2 cup red wine

  • 1 tbsp cornstarch (cornflour)

  • 1 tbsp water

  • Italian or curled parsley for garnish

Short Rib Recipe

ShortRibs-raw.jpg
  • Fill a large bowl or pot with cold water. Immerse the short ribs, and rinse the ribs in the cold water to wash off excess blood and bone dust.

  • Drain and pat dry the short ribs with paper towels. Generously sprinkle salt on all the ribs, on both sides.

  • Switch on the Instant Pot to the saute setting on high. When the instant pot is hot, pour about 2 tbsp of oil.

  • When the oil is hot, place about 3 - 4 short ribs in the instant pot to caramelize or to sear. It's important not to overcrowd the bottom in order to get nice caramelization on your short ribs.

  • Sear the short ribs on all sides, about 2 - 3 minutes per side. Place the caramelized short ribs on a plate.

  • Repeat with the rest of the short ribs.

  • For the next step, you will only need about 1 tbsp of oil in the instant pot. Discard the excess oil if there's more than 1 tbsp of it in the instant pot at this point.

  • Place the thickly sliced onion in the pot, and add some wine to de-glaze the bottom of the instant pot and make sure that all of the caramelized bits on the bottom are mixed with the wine (de-glazing is an important step, so don't skip it).

  • Add the paprika, cayenne pepper, sugar and balsamic vinegar. Then switch off the saute function on your instant pot.

  • Place the short ribs back in the instant pot and add the garlic, thyme and a pinch of salt (how much salt to add at this point depends on how well you seasoned the short ribs earlier - be careful not to over-salt, since you can always add more salt at the end if needed).

  • Pour the stock over the short ribs. Close the instant pot. Choose the manual high pressure function and set it to high. Cook the short ribs for 45 minutes, followed by a 10 - 15 minute natural release.

Instant-Pot-Short-Ribs-2534.jpg
  • Gently remove the short ribs on to a plate, and turn the saute function back on for the liquid/broth in the instant pot.

  • Dissolve the cornstarch in the water and add it to the liquid/broth in the instant pot. Mix it in and bring it to a simmer until the liquid has thickened. Taste and season the liquid with more salt or balsamic vinegar, if needed.

  • Transfer the short ribs back into the instant pot and switch off the saute function.

  • Optional step - once the short ribs have cooled off, place your instant pot cooker pot in the fridge (covered). Leave it overnight, or for at least 4 hours, until the fat has solidified on the surface. Then remove this layer of fat, and reheat the short ribs in the instant pot.

  • Serve atop your homemade mushroom risotto and garnish with Italian parsley!

Osso Bucco

One of my favorite dishes is Osso Bucco, a dish featuring a cross-cut veal shank braised with vegetables, white wine and broth.  It’s garnished with a gremolata which is a combo of garlic, lemon zest and parsley and served over risotto. The word Osso Bucco means Osso (bone) with a Bucco (hole) referring to the bone hole that is filled with marrow. I absolutely love this dish, and accompanied by a big Brunello wine, I am in heaven!

It may sound like this would be a complicated dish, but quite the contrary - it is easy to prepare, it just needs time to cook! For my birthday once, I made 12 occo bucco shanks, read about that in my blog post here. This recipe will walk you through how to make osso bucco for 4 and I highly recommend it for a nice small dinner party at your home. You will blow your guests away!

Ossobucco-final.jpeg

Ingredients

4 - 1 1/2 inch thick veal shanks - about 10-12 ounces each

1/4 cup of olive oil/butter

3 teaspoons of salt

1 1/2 teaspoons of freshly ground pepper

1/4 cup of gluten free flour

1/3 cup finely chopped pancetta

1 1/2 cups of chopped onions

1 cup of chopped carrots

3/4 cup of chopped celery

1 1/2 tablespoons minced garlic

2 bay leaves

4 teaspoons chopped fresh rosemary leaves

1 1/4 cups of red wine - use a good one!

1 cup of diced canned tomatoes

3 cups of beef broth

1/4 cup of chopped fresh Italian parsley leaves

Preparation

Ossobucco2.jpeg
Ossobucco5.jpeg

  • Place 1/4 cup of olive oil or butter or combo of each in a Dutch Oven on the stove. While the oil is heating up, season the veal shanks with 1 1/2 teaspoon of salt and 3/4 teaspoons of pepper and dredge in the flour to coat. I used gluten free flour so everyone could enjoy.

  • Remove any excess flour by giving the shanks a gentle shake -shake the shank! When the oil is almost smoking, add the shanks and cook until well browned on all sides - I make sure the edges are browned too. Transfer the shanks to a plate and cover with foil.

  • Now add the pancetta, celery, carrots and onions to the pan and cook using a wood spoon to scrape the meat bits free. Cook, stirring occasionally, until the veggies are soft yet still firm and lightly browned about 4-5 minutes.

  • Add the garlic, bay leaves, rosemary and remaining salt and pepper and cook for about a minute. Add the wine - you can add red or white - I like red. Stir to combine with the veggie mixture.

  • Now add the crushed or diced tomatoes and beef stock and then return the shanks into the Dutch Oven and get them bathed in the goodness.

Ossobucco6.jpeg
Ossobucco7.jpeg
  • Bring the mixture to a boil and then cover and reduce the heat to medium low and cook, covered, for 3 hours or when the shanks are soft and tender and starting to fall away from the bone.

  • Make sure you open that Brunello in the morning so it has all day to breathe. Serve hot and enjoy!

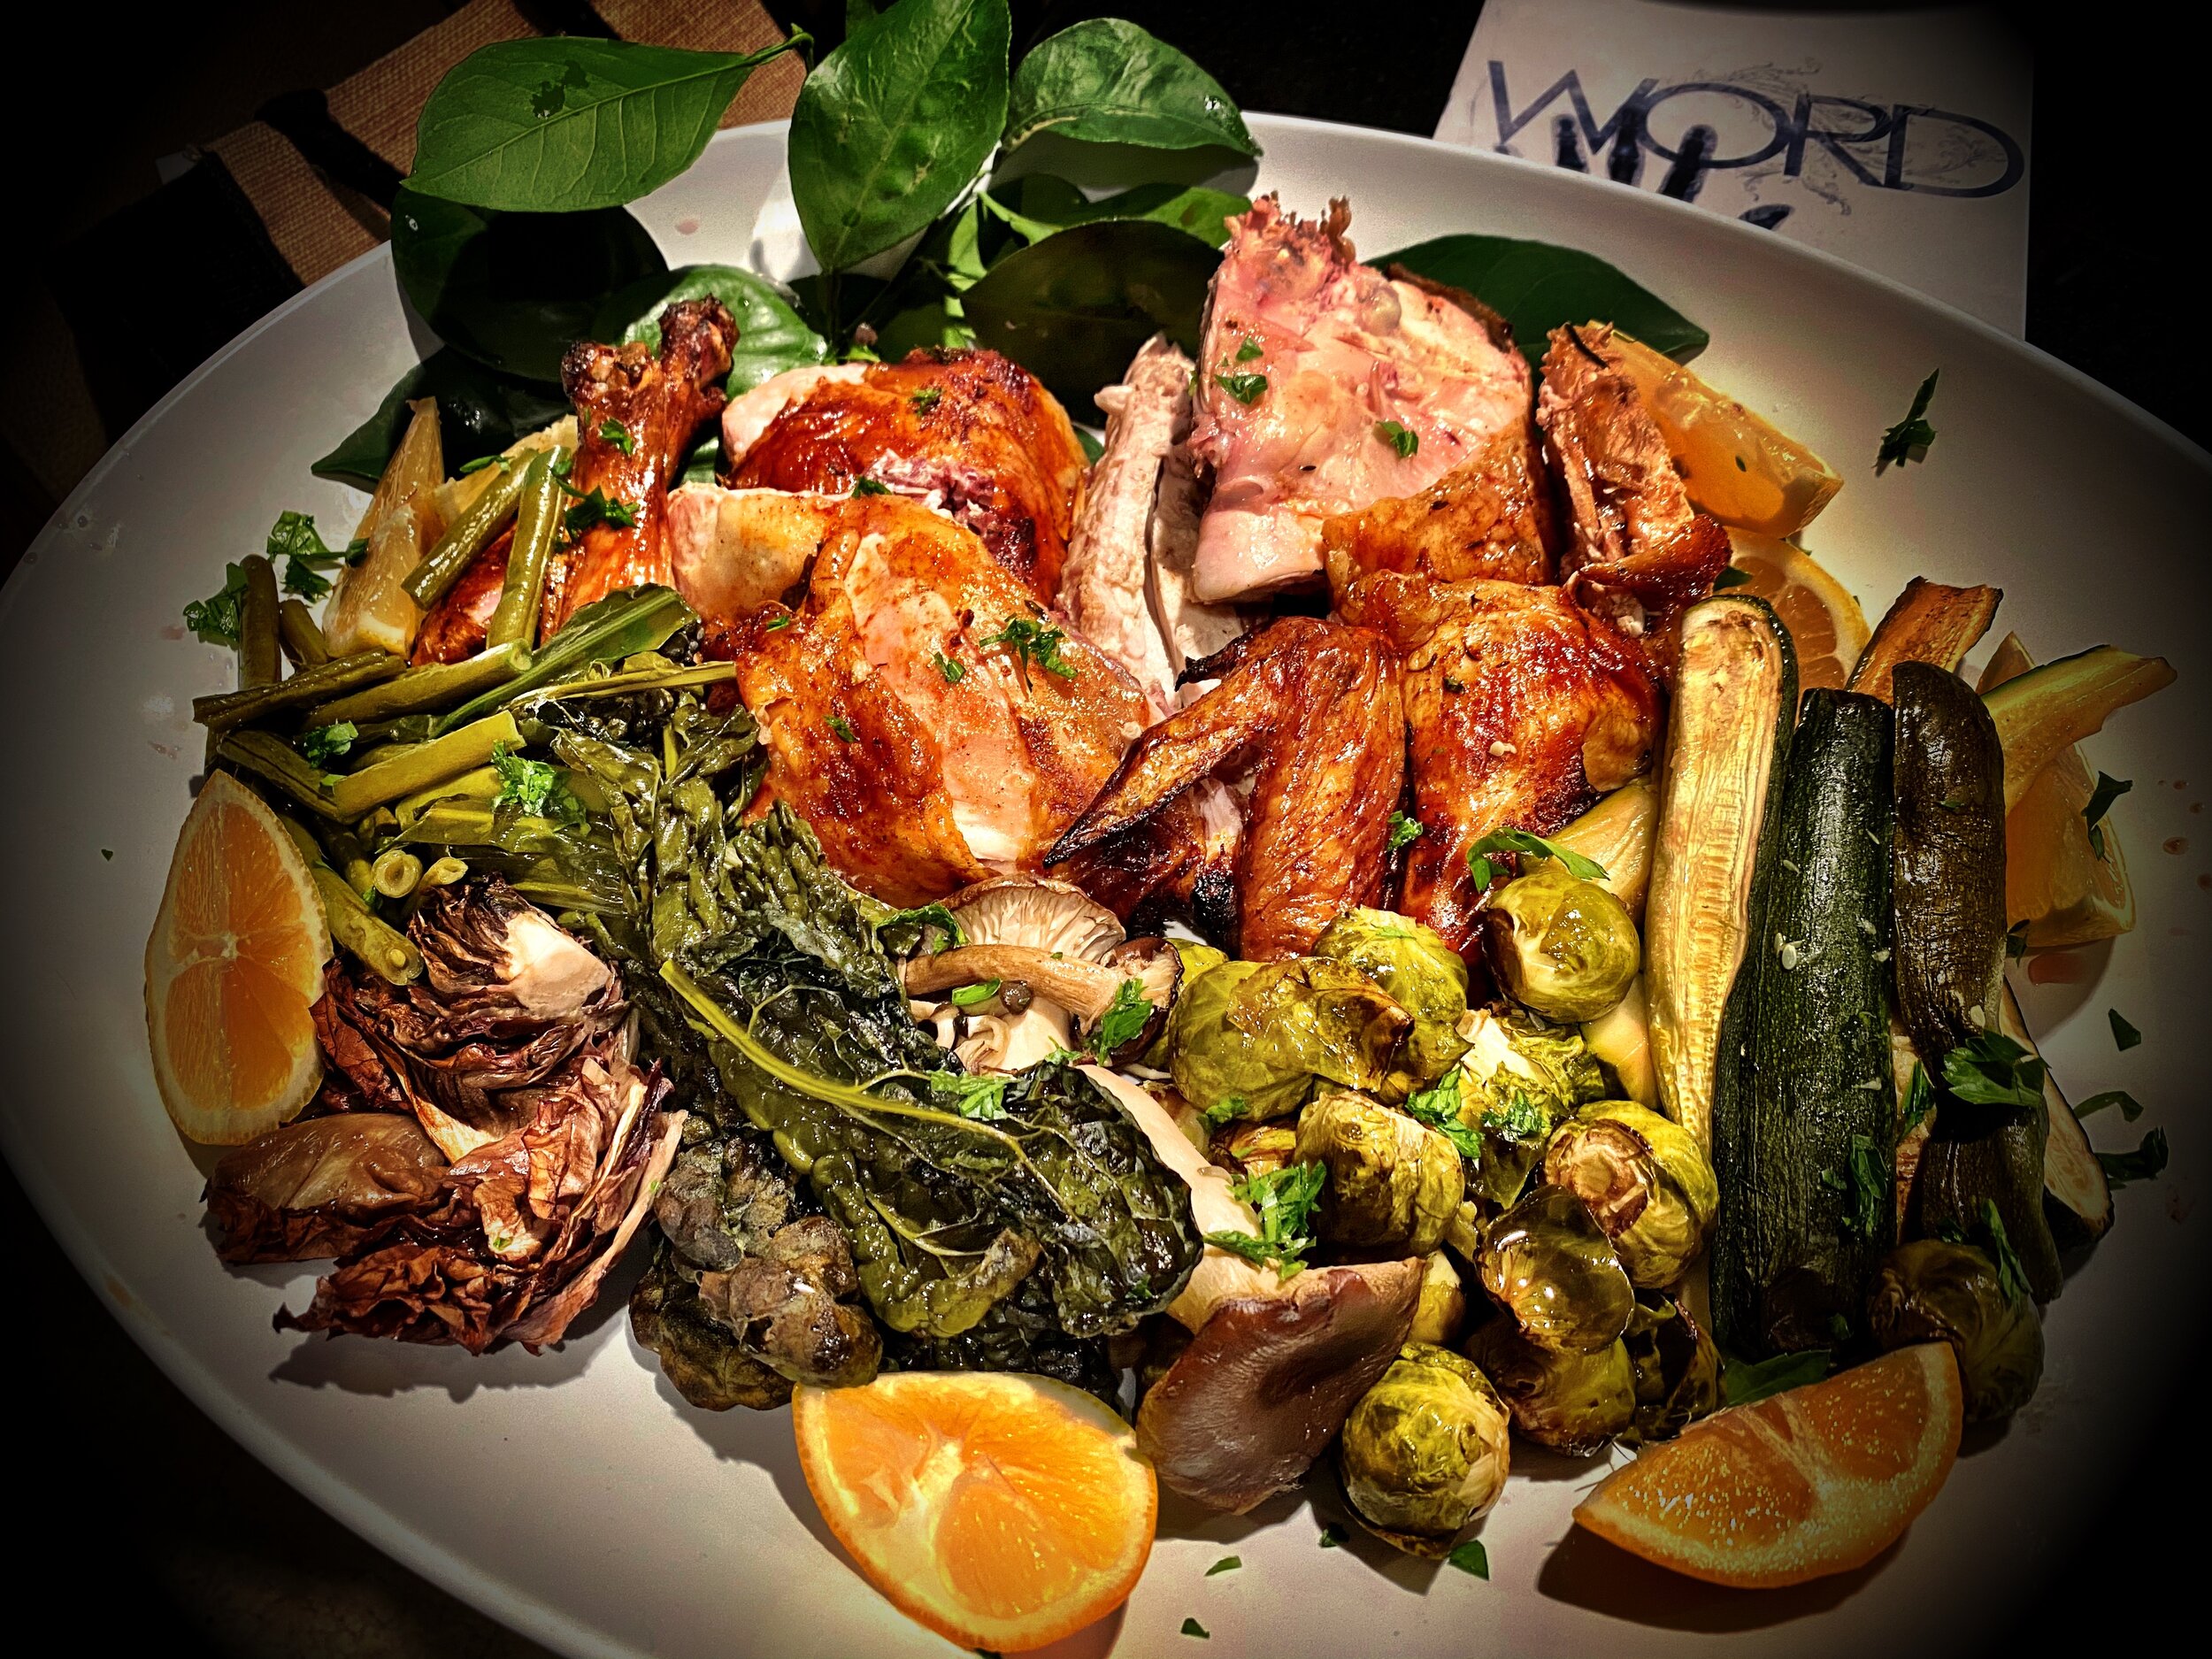
Spatchcock Grilled Jerk Chicken

Here I have a zesty grilled Jerk chicken recipe for you that's easy, filling and makes great leftover options.

Ingredients:

6 Servings per chicken

* 1 medium organic whole chicken

* 2 cloves of garlic finely chopped

* One New Mexico dried red chili, deseeded and de-stemmed and chopped/crushed.

* 2 tbsp of Caribbean jerk seasoning

* Fresh Italian parsley, coarsely chopped as needed.

* ¼ cup of olive oil as needed to cover the chicken

* 1 tsp of salt and 1 tsp pepper

JerkChickenGrill.jpeg

Preparation

* To spatchcock the chicken - wash the chicken and pat dry. Then lay the chicken breast side down on a cutting board. I like to use a set of kitchen shears and cut along both sides of the chicken backbone and remove the backbone. Turn the bird over and flatten the bird out by cracking the breast bone.

* I then sprinkle some olive oil over the chicken and use my hands to rub it all over the chicken - then wash!

*Then squeeze lime juice all over the chicken and then generously sprinkle the jerk seasoning combined with the garlic and red chili all over the chicken, along with salt and pepper.

* Then place the chicken on the grill breast side up (if grilling on a Weber or similar grille, grill the chicken indirectly) and grill the chicken for about 30-45 minutes before flipping to the other side and grill another 30-45 minutes depending on the size of the chicken until the chicken comes up to a temperature of 165º. I love to grill the chicken on my Traeger grill and so I set mine to Smoke until I see the smoke and then I crank my Traeger to 450º.

* After grilling, let the chicken rest by covering with foil for 10-15 minutes. Cut the chicken into the pieces you like and garnish with more freshly squeezed lime juice and sprinkling of parsley. Serve with grilled vegetables, or rice, potatoes, risotto etc. Save the leftovers for topping a salad, tacos, whatever - ENJOY.

JerkChickenFinal.jpeg

Grandma Karin’s Open-Face Red Chile Enchiladas

Mark’s Mom Karin, makes some mean enchiladas. Karin was born in the former East Germany, so she didn’t learn to make Red Chile Enchiladas there! She learned the recipe from her mother-in-law, Rose Candelaria, in Durango, Colorado. This is Mark’s spin on both of their recipes.

Enchiladas.jpg

INGREDIENTS

Red Chile Sauce

• 12 Hatch red chiles with stems and seeds removed but not the veins

• 2 cups water

• 1 1/2 cups of chicken broth

• 2 cloves organic garlic roughly chopped

• 2 peppercorns crushed

• 1/2 tsp of cinnamon

• 1/4 tsp dried oregano; use Mexican dried oregano, if possible

• 1/3 cup dried red Chile powder

• Sea salt to taste

Enchiladas

• 2–4 lbs pork or beef roast – boneless or bone in

• Salt and pepper to taste

• 1 1/2 tsps of oregano

• 6–8” corn tortillas – right out of the bag

• Diced tomatoes

• Diced red onions

• Shredded Mexican cheese or Cheddar

• Sliced radishes

• Shredded iceberg lettuce

• Cilantro and a lime wedge to garnish, and you can always add a dollop of sour cream

IMG_2396.jpg
IMG_2406.jpg

PREPARATION

Red Chile Sauce

• Remove the stems and seeds from the dried chilies. Flatten the chiles as much as possible and place on a metal sheet pan and then lightly smoke and toast them in your smoker, taking care not to let them burn. You just want to warm them up and infuse that smoky flavor.

• Transfer the chiles to a pot, cover with water and bring them to a simmer; continue cooking for about 5 minutes. Set them aside to soak for another 10 minutes; by this time, they should be rehydrated and fleshy. Discard all but a cup of the water.

• Put 1 cup of chicken broth and the one cup of Chile water into the blender, add the garlic, peppercorns, oregano, salt, cinnamon and blend as smooth as possible. I also like to add some dried powdered Chile; use whatever level of heat you want to kick up your sauce.

• Add the chiles and blend them as much as you can so you get a nice thick liquid. Add more dried Chile or more broth to adjust to the desired thickness. You want it to have a nice thickness –– not too runny and not too thick –– like a nice gravy.

• Transfer the sauce to a bowl through a fairly fine strainer, pressing as hard as you can to extract as much of the flesh as possible. Discard the debris of tough skin still remaining. Add more salt and oregano if necessary. Your sauce is ready to go!

Meat Preparation and Enchilada Assembly

• While your sauce is underway, you can prep your meat. I have used everything from a boneless or bone-in pork roast that I cube and brown with a little flour. I have used chicken, crab, cubed fish, lobster, smoked brisket, beef cubes, basically whatever. Many times I will use the leftovers from a plentiful barbecue to make enchiladas the next day.

• Season with garlic, salt, pepper and more oregano.

• With your meat cubed and browned or if leftovers are ready to go, toss them in the prepared red Chile sauce and let everything simmer –– the longer the better so the meat absorbs the moisture of the red Chile sauce.

• To assemble the enchiladas, take one corn tortilla from the bag and quickly toss it in the sauce and pull it out with tongs and lay flat on the plate with which you will serve the enchiladas in. Don’t leave in the sauce for more than a couple of seconds or it will fall apart. You can always do a second as two on a plate look great.

• Spoon some meat and sauce on the dipped tortilla. Top with the cheese, onion, lettuce, radishes and tomato.

• Garnish with the lime, sour cream and diced cilantro.

Enjoy!

Red Chile Smoked Pork Pozole Rojo

Whenever I think of or visit Enchantment Resort, my early project done during the 1980s in Sedona, AZ, I always crave Pozole. Enchantment Resort sits in Boynton Canyon, which is sacred to the Yavapai Tribe, and this dish originated with the native people of Mexico. The word “pozole” means hominy, the main ingredient of this stew. This recipe is a Candelaria-family favorite and was made often by my Grandma Rose in Durango. Enjoy with a shot of tequila and an orange wedge sprinkled with cinnamon sugar.

PozoleRojo.jpg

Red Chile Smoked Pork Pozole Rojo

6–8 Servings

Red Chile Sauce

Follow this recipe or substitute 1–13 oz defrosted tub of Hatch Red Chile, heat level temperature as you like it from mild, medium to hot.

• 12 Hatch red chiles with stems and seeds removed but not the veins

• 2 cups water

• 1 1/2 cups of chicken broth

• 2 cloves organic garlic roughly chopped

• 2 peppercorns crushed

• 1/2 tsp of cinnamon

• 1/4 tsp dried oregano; use Mexican dried oregano, if possible

• 1/3 cup dried red chile powder

• Sea salt to taste

Smoked Pulled Pork Pozole

• 1 5lb bone-in pork butt

• 1-1/2 cups of apple juice

• 4 tbsps brown sugar

• 1 tsp of smoked paprika

• 1 tbsp of salt

• 1 110oz can of Mexican Style hominy, drained and rinsed

• 6 cloves of garlic, diced

• 1 yellow onion, diced

• 1 tsp dried oregano; use Mexican dried oregano, if possible

• 2 bay leaves

• 1 to 2 boxes of 15.5ozs of chicken broth

• salt and pepper to taste


Garnish

• Diced red onions

• Shredded Mexican cheese or Cheddar cheese

• Sliced radishes

• Shredded iceberg lettuce

• Cilantro and a lime wedge

• Optional dollop of Sour Cream

Preparation

Red Chile Sauce

• Remove the stems and seeds from the dried chilies. Flatten the chiles as much as possible and place on a metal sheet pan and then lightly smoke and toast them in your smoker, taking care not to let them burn. You just want to warm them up and infuse that smoky flavor.

• Transfer the chiles to a pot, cover with water and bring them to a simmer; continue cooking for about 5 minutes. Set them aside to soak for another 10 minutes; by this time, they should be rehydrated and fleshy. Discard all but a cup of the water.

• Put 1 cup of chicken broth and the one cup of chile water into the blender, add the garlic, peppercorns, oregano, salt, cinnamon and blend as smooth as possible. I also like to add some dried powdered chile; use whatever level of heat you want to kick up your sauce.

• Add the chiles and blend them as much as you can so you get a nice thick liquid. Add more dried chile or more broth to adjust to the desired thickness. You want it to have a nice thickness –– not too runny and not too thick –– like a nice gravy.

• Transfer the sauce to a bowl through a fairly fine strainer, pressing as hard as you can to extract as much of the flesh as possible. Discard the debris of tough skin still remaining. Add more salt and oregano if necessary. Your sauce is ready to go!

IMG_0924.jpg
IMG_0922.jpg

Smoked Pulled Pork Pozole

• Drain and rinse the hominy and set aside.

• Trim the pork butt of all excess fat leaving the top fat cap intact.

• Combine apple juice, brown sugar, paprika, 2 cloves of garlic smashed and salt in a small bowl and stir until the sugar is dissolved. Using a meat injector, inject the pork butt all over with the mixture. Rub the exterior with olive oil and well coat with your favorite rub.

• Place the pork butt in the smoker and smoke for 1–2 hours.

• Then I like to take the pork butt off the smoker and break it into chunks and put it in the Instant Pot with 1 cup of chicken broth. Close the lid, set to high pressure and cook for 40 minutes. When done, release the lid and remove, reserving the juice.

• Sauté the onions and remaining garlic in a little olive oil in a stock pot until tender and translucent. Shred the pork and pour the juice from the Instant Pot and add the pulled pork into the stock pot with the onions and garlic and then add the drained and rinsed hominy. Add the red chile sauce, and as much broth as you like.

• Add salt, pepper, oregano and two bay leaves and bring to a boil, then simmer as long as you can.

• Serve in a bowl and garnish as you prefer.
Enjoy!